Dissection tutorials
Slugs: Veronicellidae dissection
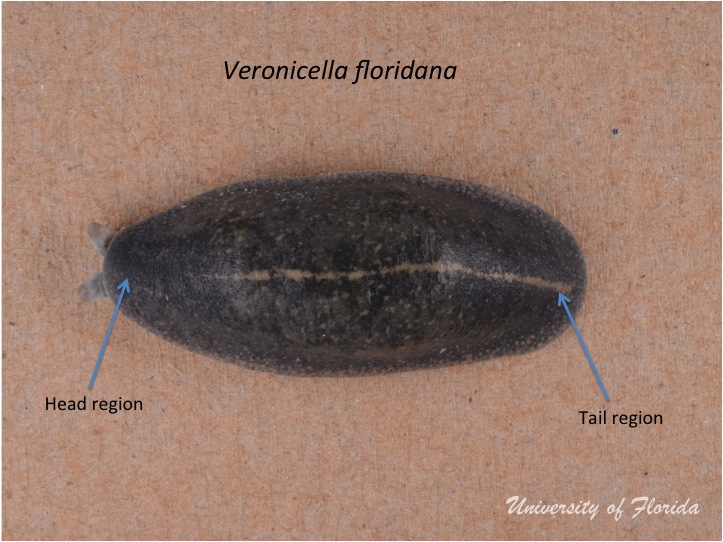
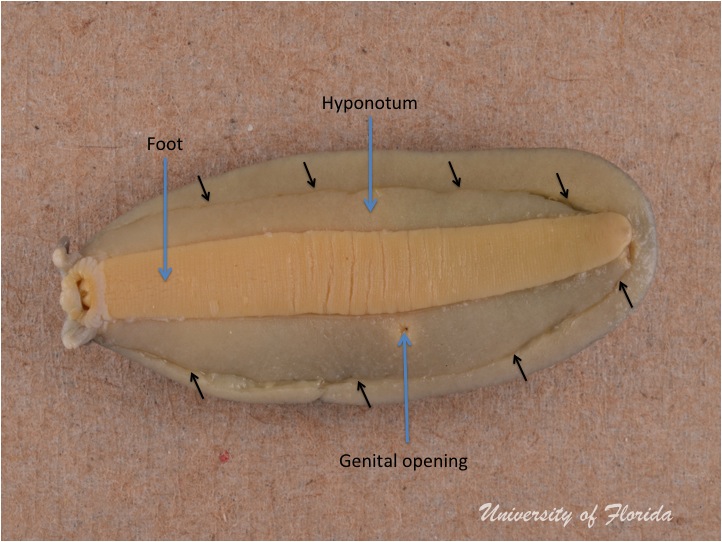
Step 1: Note the external anatomy of the relaxed specimen
Submerge the relaxed, extended adult specimen in a dish with 75% ethanol or water.
-
Figure 1 -
Figure 2
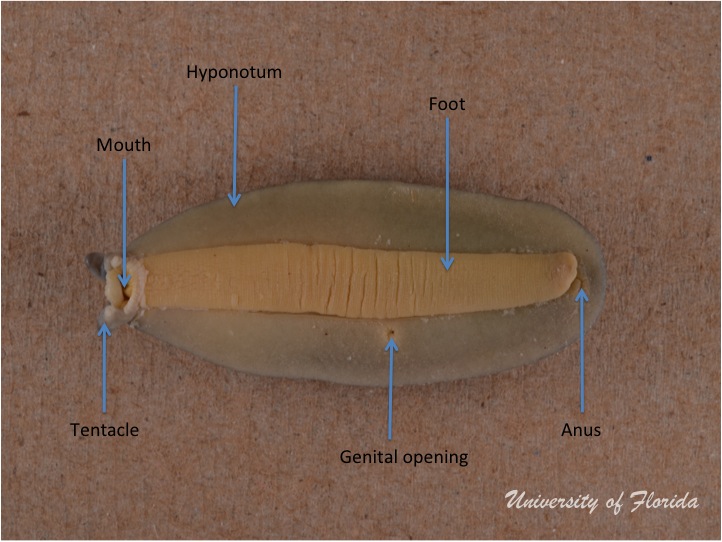
Step 2: Cut along the inner portion of the hyponotum
Make a shallow incision near the anus using a pair of sharp dissecting scissors. Angle scissors upwards and proceed with incision along the hyponotumHyponotum:
The ventral surface of the mantle. This structure can be found on either sides of the foot.
of the animal. The incision should be made on the inner side if the hyponotumHyponotum:
The ventral surface of the mantle. This structure can be found on either sides of the foot.
. Cut towards the headHead:
The area of a mollusc's body that has the tentacles, eyes and mouth.
of the animal (on both sides) to remove the mantleMantle:
A fleshy, membranous covering of the anterior portion of the body of a mollusc. It secretes the materials that form the shell.
.
-
Figure 3 -
Figure 4

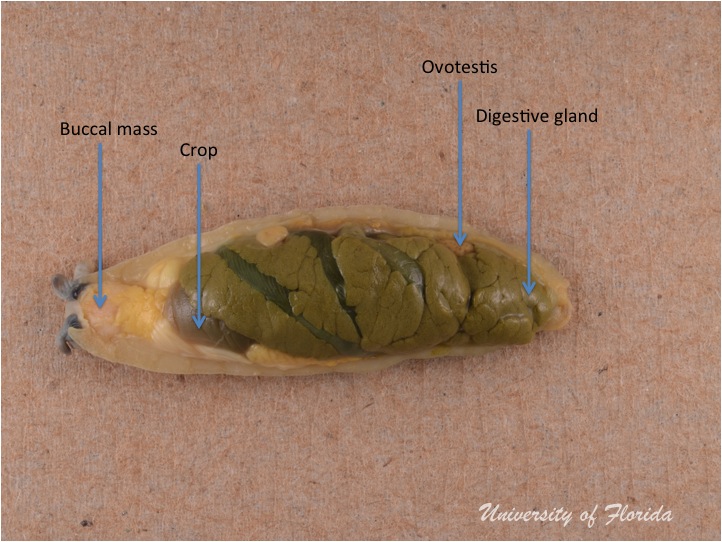
Step 3: Remove the mantle of the animal
Gently peel back the mantleMantle:
A fleshy, membranous covering of the anterior portion of the body of a mollusc. It secretes the materials that form the shell.
to expose the contents of the animal. Begin at the tip of the tail and work towards the headHead:
The area of a mollusc's body that has the tentacles, eyes and mouth.
.
-
Figure 5 -
Figure 6

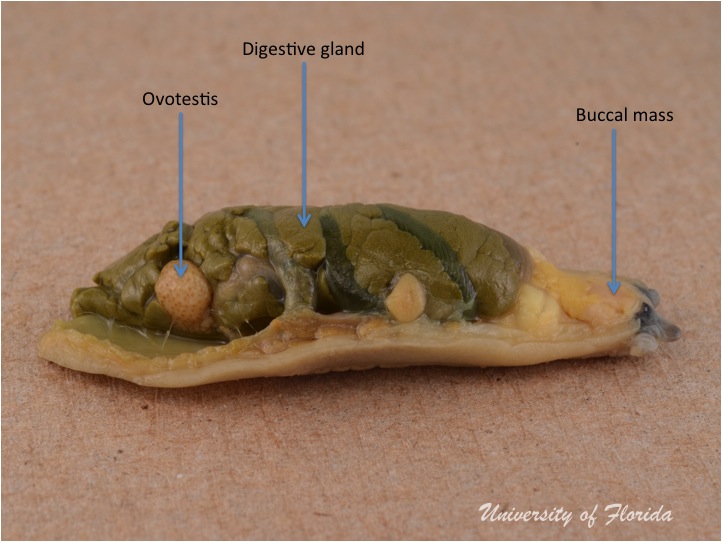
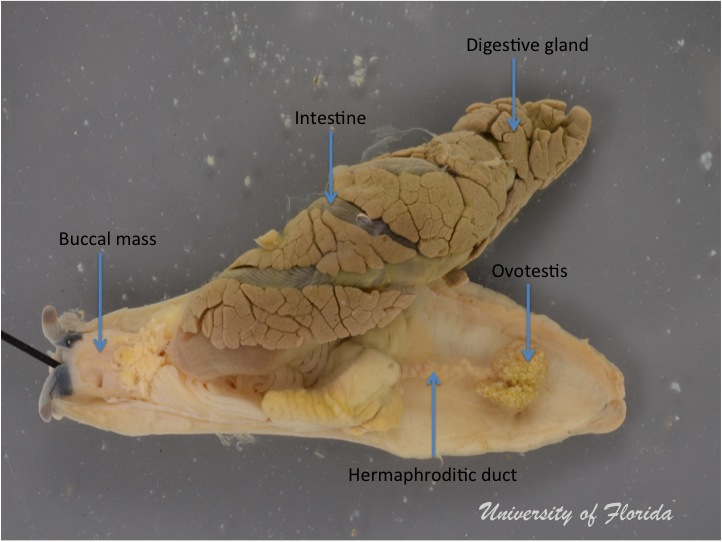
Step 4: Remove the ovotestis from the digestive gland
Gently remove the areas of the digestive gland that cover the ovotestis. The ovotestis is often embedded in the digestive gland but is easily identified, as it is typically a different color (or shade). Make incisions along the sides of the hermaphroditicHermaphroditic:
State of having both male and female reproductive organs. (See also Hermaphrodite)
duct to remove all lateral connections to the digestive gland. The animal may need to be inverted for these steps.
-
Figure 7 -
Figure 8 -
Figure 9
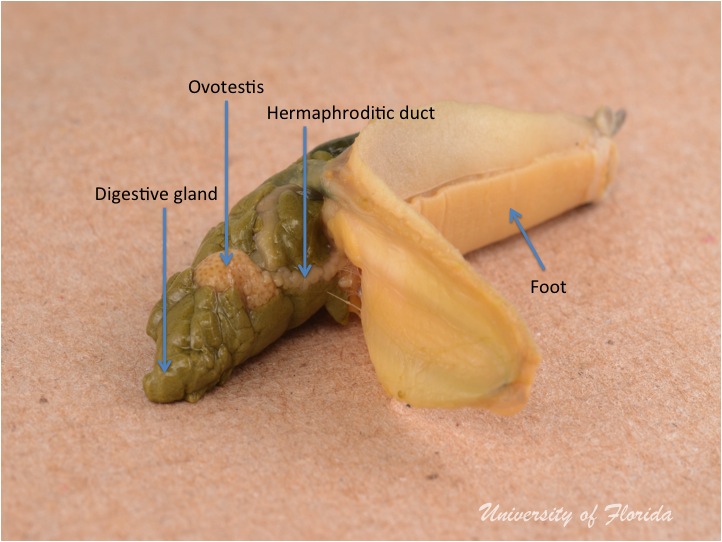
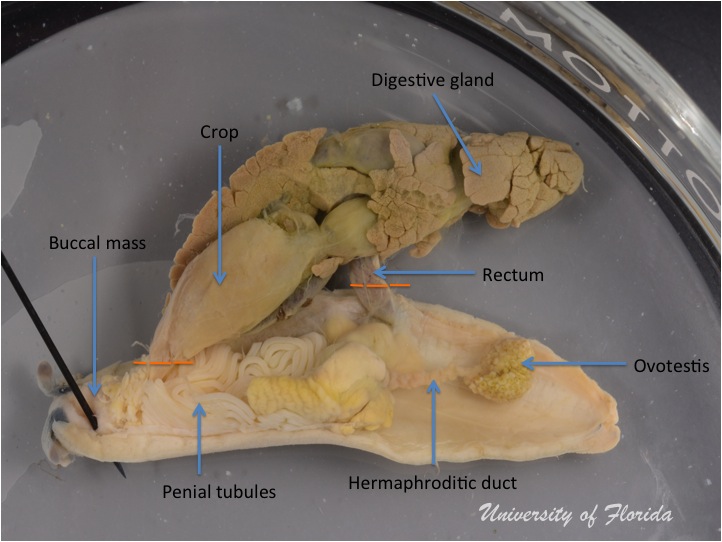
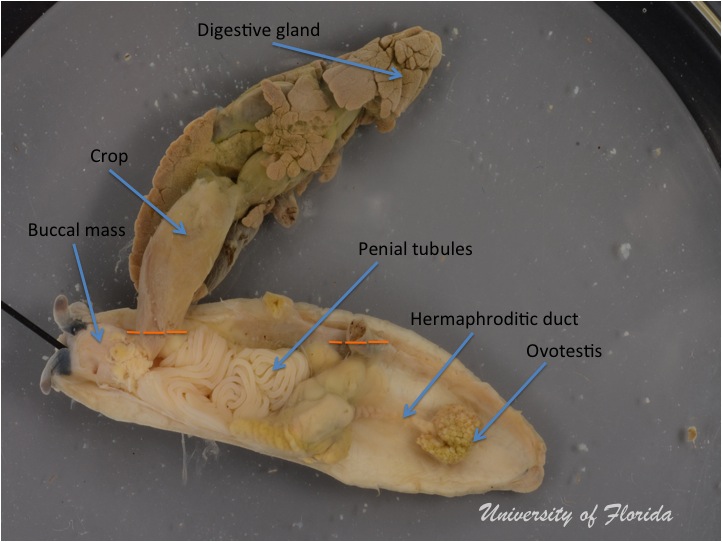
Step 5: Separate the reproductive system from the digestive system
Orient the animal as illustrated in Figure 10 so that the reproductive system is above the digestive system. Make incisions along the dashed lines to separate both systems (Figure 10-11).
-
Figure 10 -
Figure 11 -
Figure 12

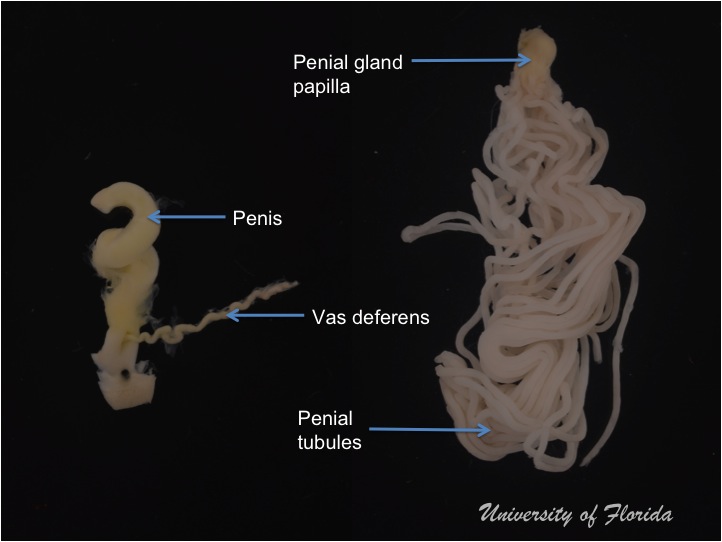
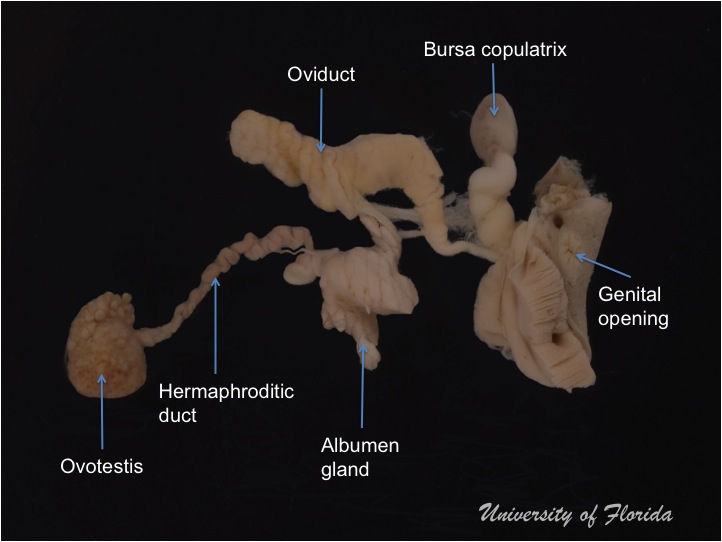
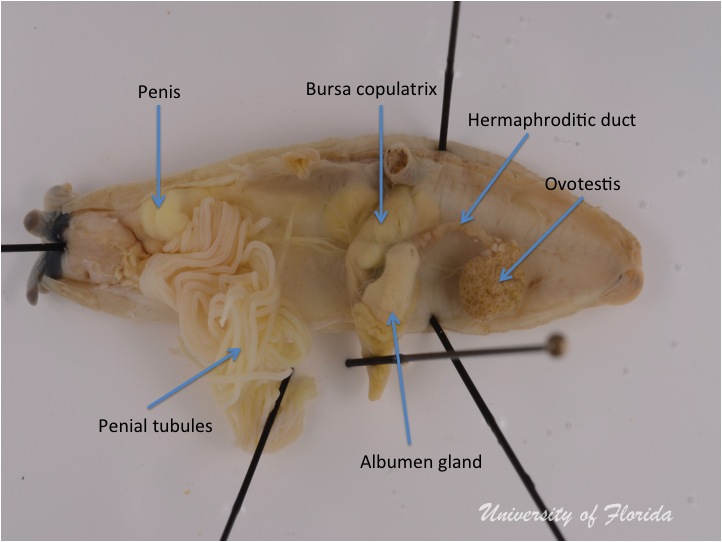
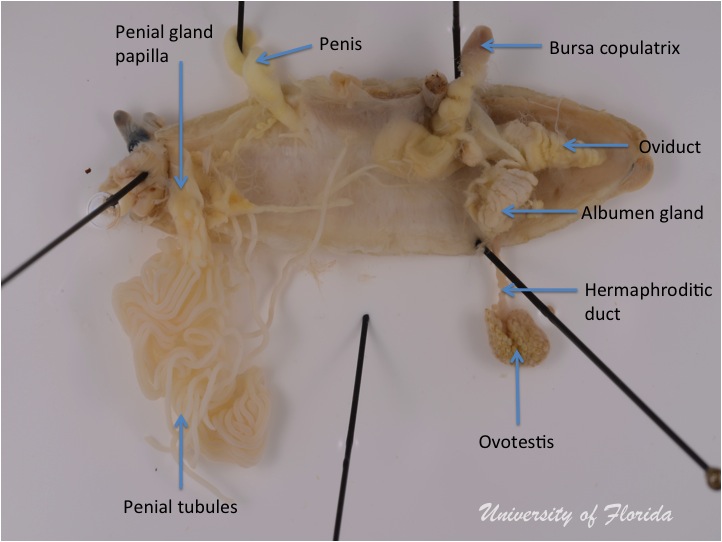
Step 6: Unravel the reproductive system
Figure 13 displays the entire reproductive system. The structures are compressed and intertwined at this stage and need to be teased apart. Use an insect pin to gently unravel each portion of the system by following the connection to each.
-
Figure 13 -
Figure 14
Step 7: treatment for photography
If a photograph of the reproductive system is required, the structures can be arranged and pinned as desired then fixed in place by immersion in 95% ethanol for approximately 15 minutes. DO NOT leave the reproductive structures in 95% ethanol for an extended period as dehydration and distortion will occur. The pins can be removed from the specimen for photography or closer examination.
-
Figure 15 -
Figure 16 -
Figure 17