Dissection tutorials
Snail dissection
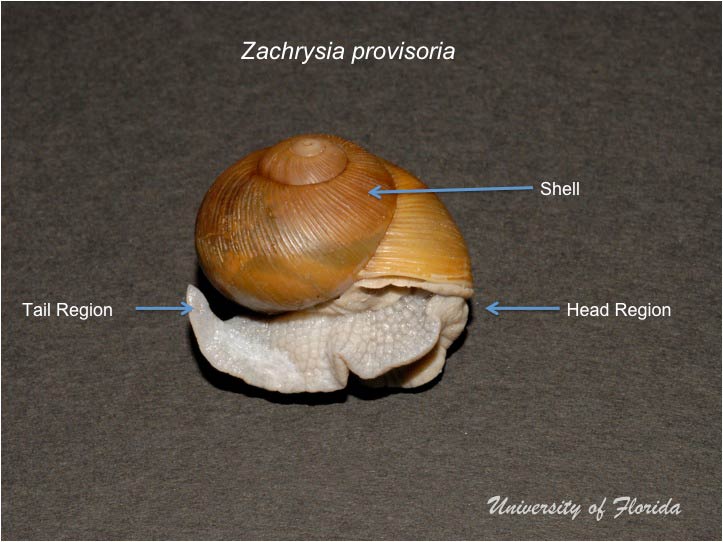
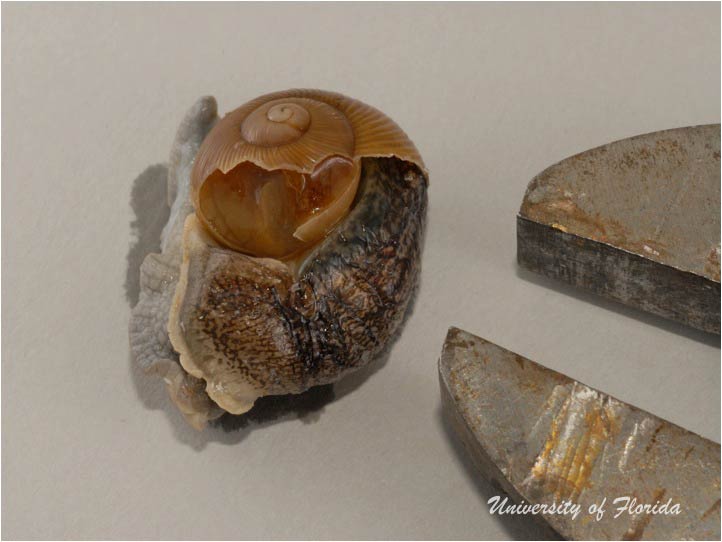
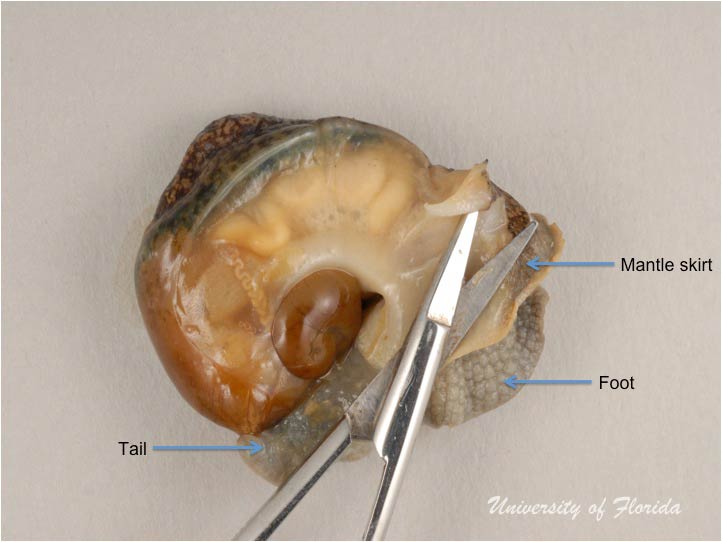
Step 1: orient the specimen.
This is a photograph of a freshly preserved animal. Note the headHead:
The area of a mollusc's body that has the tentacles, eyes and mouth.
and tail region of the animal, as the specimen will appear different
after removal of the shellShell:
A hard, inflexible, calcareous or chitinous structure that vary in size and may either completely encasing the animal, covering some part of it or be internal.
. For humane purposes, ensure that the animal is completely unresponsive to touch before initiating
the dissection. See the 'getting started' section on how to relax the specimen.
-
Figure 1
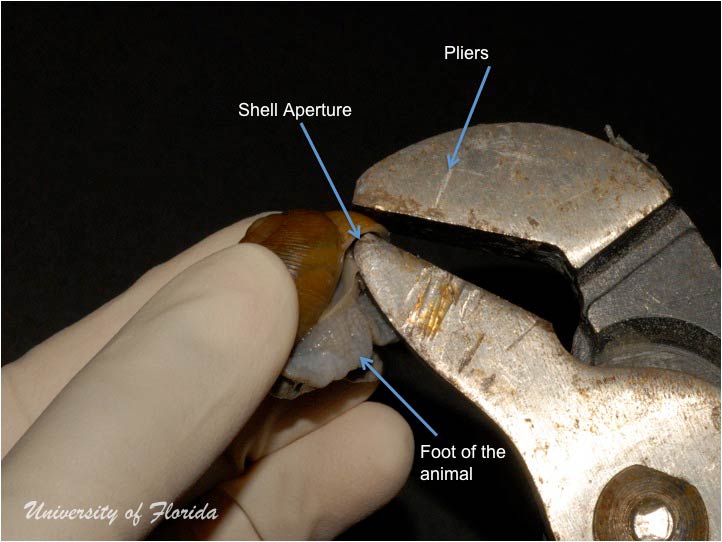
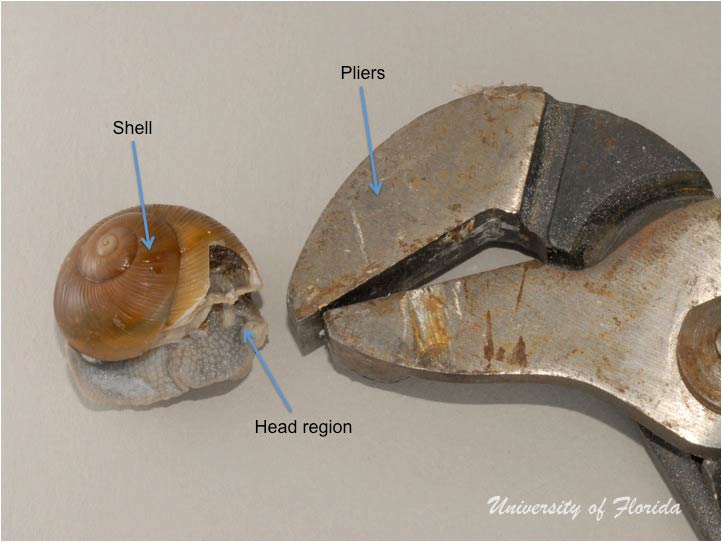
Step 2: remove the animal from the shell.
In some cases, it may be possible to remove the dead animal from its shellShell:
A hard, inflexible, calcareous or chitinous structure that vary in size and may either completely encasing the animal, covering some part of it or be internal.
using curved forceps. If this is not possible, slowly break the shellShell:
A hard, inflexible, calcareous or chitinous structure that vary in size and may either completely encasing the animal, covering some part of it or be internal.
from the apertureAperture:
The major opening of a shell that the body of the animal may be retracted.
backwards, following the whorlsWhorls:
Pleural of whorl. A whorl is a complete spiral turn/growth of the shell of a mollusc. The whorls are counted from the apex outwards.
, until the animal can be removed from the shellShell:
A hard, inflexible, calcareous or chitinous structure that vary in size and may either completely encasing the animal, covering some part of it or be internal.
intact. (It is important to retain the broken pieces of the shellShell:
A hard, inflexible, calcareous or chitinous structure that vary in size and may either completely encasing the animal, covering some part of it or be internal.
for identification purposes). A pair of needle-nose pliers may be used depending on the size of the animal’s shellShell:
A hard, inflexible, calcareous or chitinous structure that vary in size and may either completely encasing the animal, covering some part of it or be internal.
.
-
Figure 2 -
Figure 3 -
Figure 4 -
Figure 5

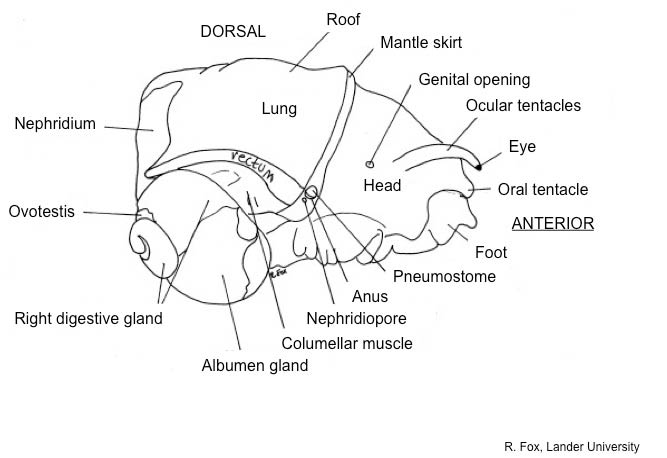
Step 3: submerge “shell-less” animal in 75% ethanol or water
Diagram showing a Helix species with the shellShell:
A hard, inflexible, calcareous or chitinous structure that vary in size and may either completely encasing the animal, covering some part of it or be internal.
removed (Figure 6) is provided to assist with the orientation of the specimen.
Place the “shell-less” adult specimen in a dish with 75% ethanol or water covering it.
-
Figure 6 -
Figure 7
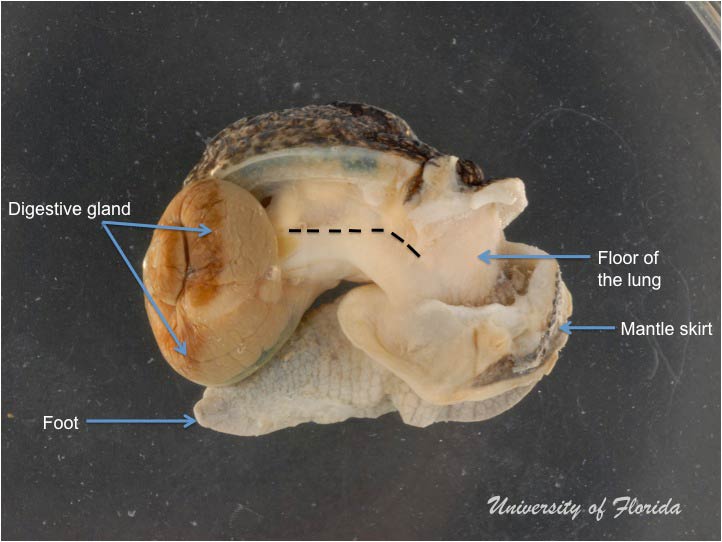
Step 4: uncoil snail and make an incision above the mantle skirt
Slowly uncoil the portion of the animal that was inside the shellShell:
A hard, inflexible, calcareous or chitinous structure that vary in size and may either completely encasing the animal, covering some part of it or be internal.
to expose its contents. Make an incision just above the mantleMantle:
A fleshy, membranous covering of the anterior portion of the body of a mollusc. It secretes the materials that form the shell.
skirt as indicated
by the broken line in Figure 08. Be sure to make shallow incisions and angle the scissors upwards and away from the internal organs.
Cut as far along the skirt as possible.
-
Figure 8 -
Figure 9
Step 5: cut along the length of the thin membrane
Cut along the dotted line as indicated in Figure 10. Avoid all internal organs/structures by only cutting the thin (transparent) membrane.
Continue with the incision along the edge of the membrane all the way to the first whorlWhorl:
A complete spiral turn/growth of the shell of a mollusc. The whorls are counted from the apex outwards.
. This will expose portions of the reproductive
and digestive system. Also, cut along the lines indicated in Figure 12 to expose the baseBase:
This is the lower or underside of the shell; opposite of apical.
of both systems.
-
Figure 10 -
Figure 11 -
Figure 12
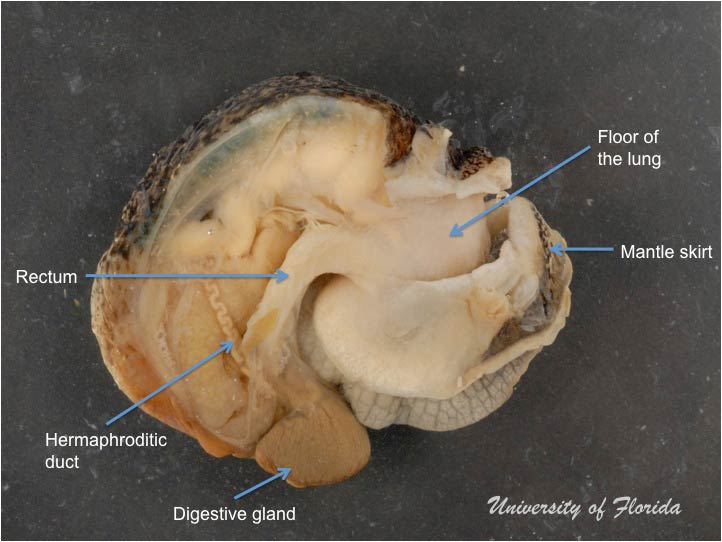
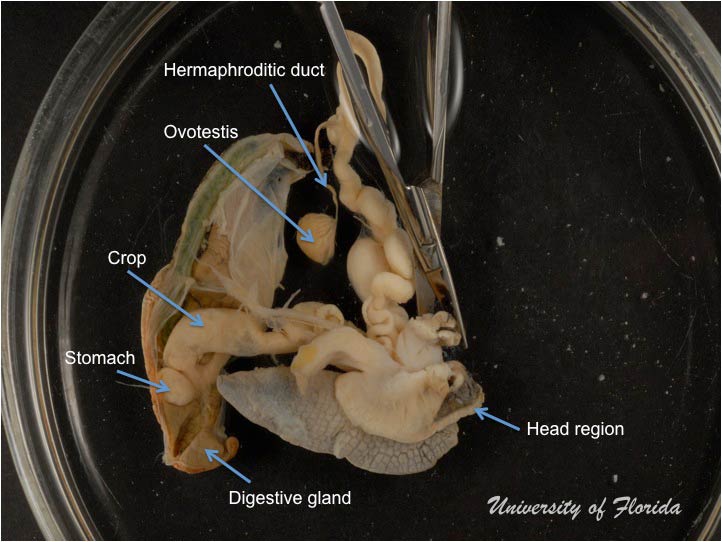
Step 6: peel back the membrane to expose the internal organs
Peel back the transparent membrane to expose the internal organs. Continue with the incision made in Figure 12 all the way to the end of the coiled
regions of the animal (portion that was retained inside the shellShell:
A hard, inflexible, calcareous or chitinous structure that vary in size and may either completely encasing the animal, covering some part of it or be internal.
). The animal may be inverted to accomplish this as indicated by the broken lines in Figure 15.
-
Figure 13 -
Figure 14 -
Figure 15
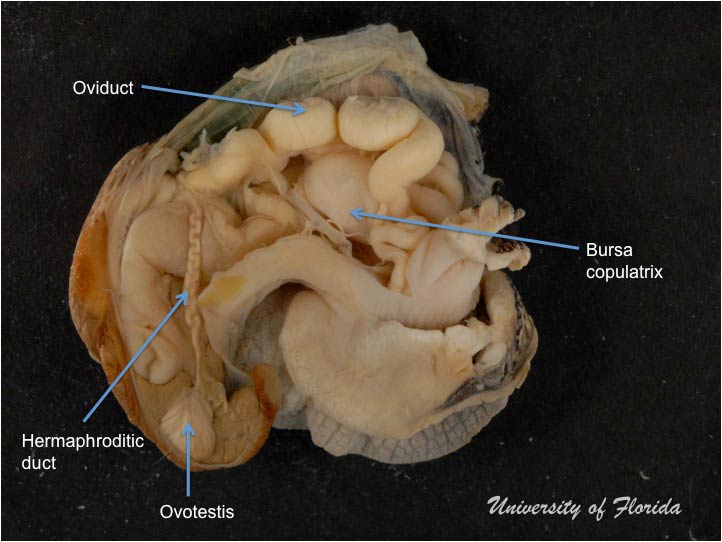

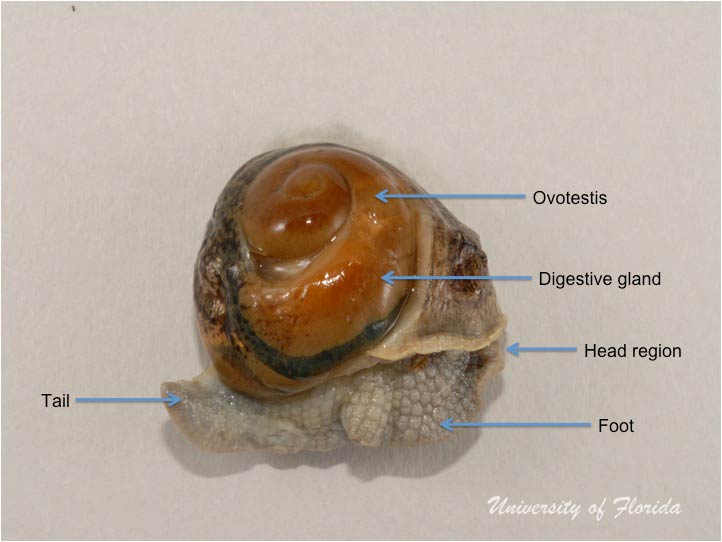
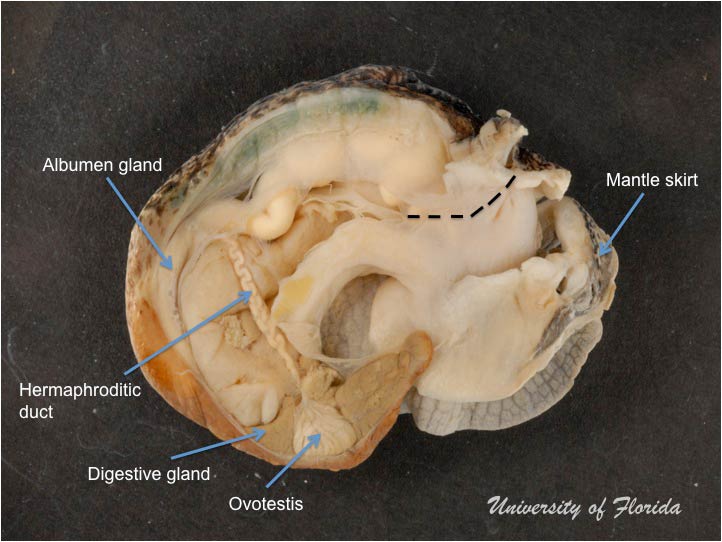
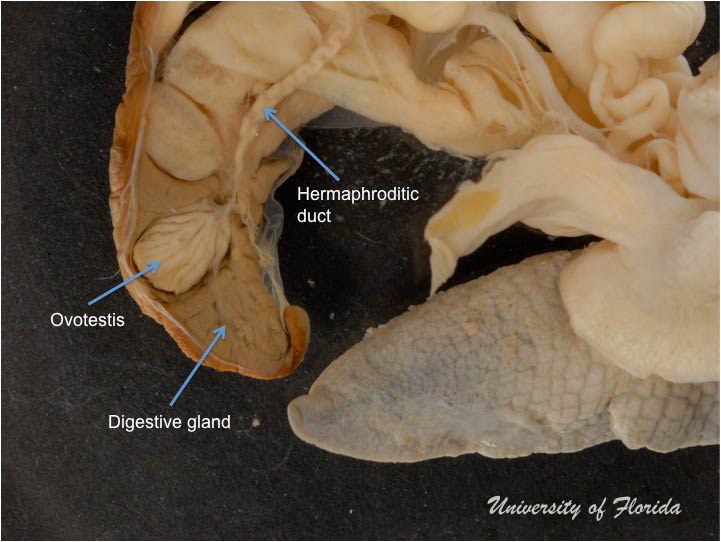
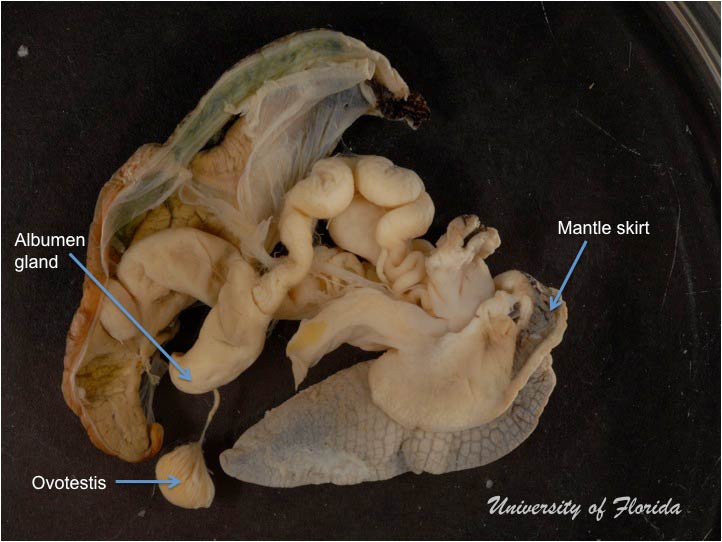
Step 7: remove ovotestis from digestive gland
Slowly tease the ovotestis and the albumen gland away from the digestive gland. Both organs can be carefully separated with a pair of tweezers. Once dislodged, both systems can be separated as indicated in Figure 19.
-
Figure 16 -
Figure 17 -
Figure 18 -
Figure 19
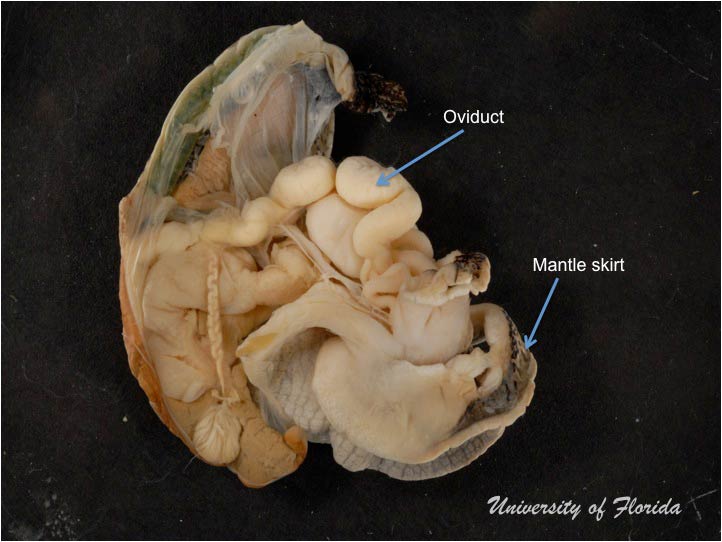
Step 8: cut forward into the mantle skirt to expose the base of the reproductive system
Rotate the animal unto the side (may have to hold in hands) and cut into the mantleMantle:
A fleshy, membranous covering of the anterior portion of the body of a mollusc. It secretes the materials that form the shell.
skirt going forward, towards the headHead:
The area of a mollusc's body that has the tentacles, eyes and mouth.
.
Be sure to make the incision between the ocular tentaclesTentacles:
Sensory projections on the head end of a mollusc. There are generally two pairs; upper (posterior) and smaller, lower (anterior). The upper pair bears the eyes. In many snails the eyes are located at the tips of this structure; however, in Basommatophoran snail species, the eyes are located at the base of the tentacles.
. This cut will expose the basal region of the reproductive system.
The pins can be removed from the specimen for photography or closer examination.
-
Figure 20 -
Figure 21
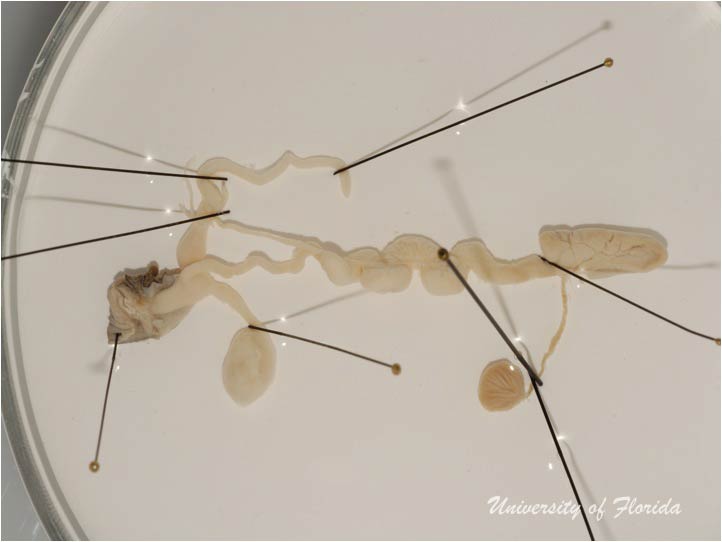
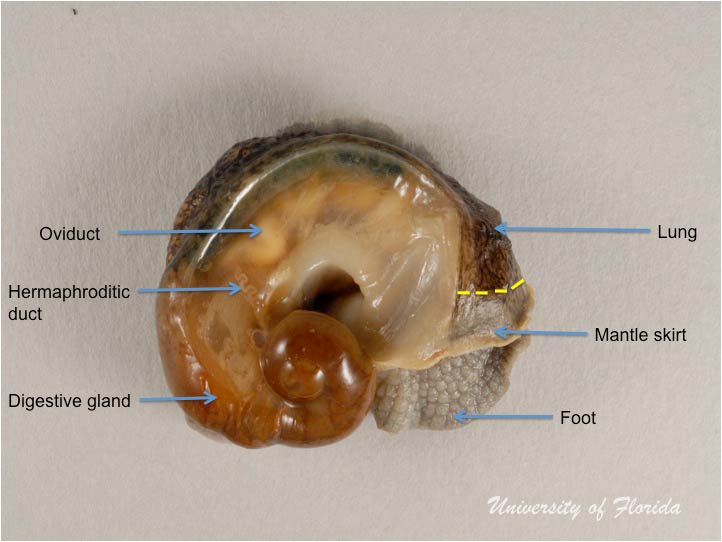
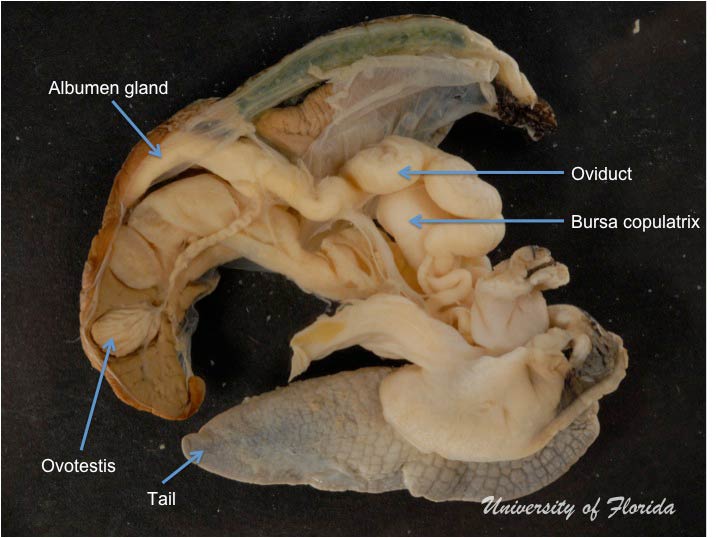
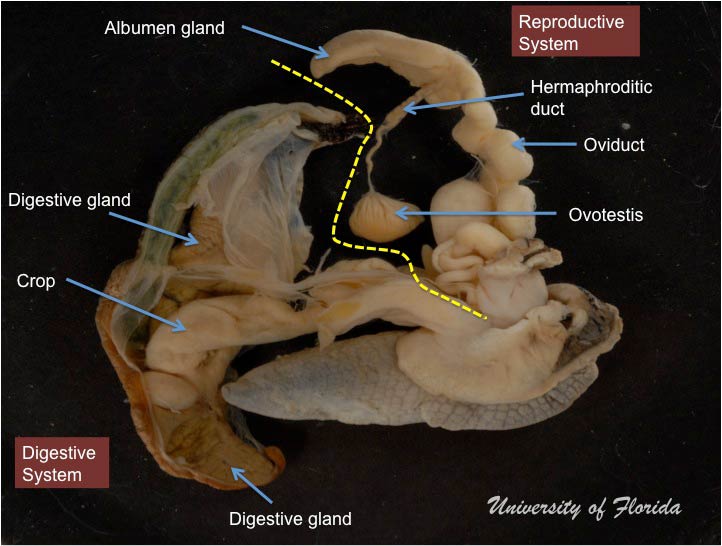
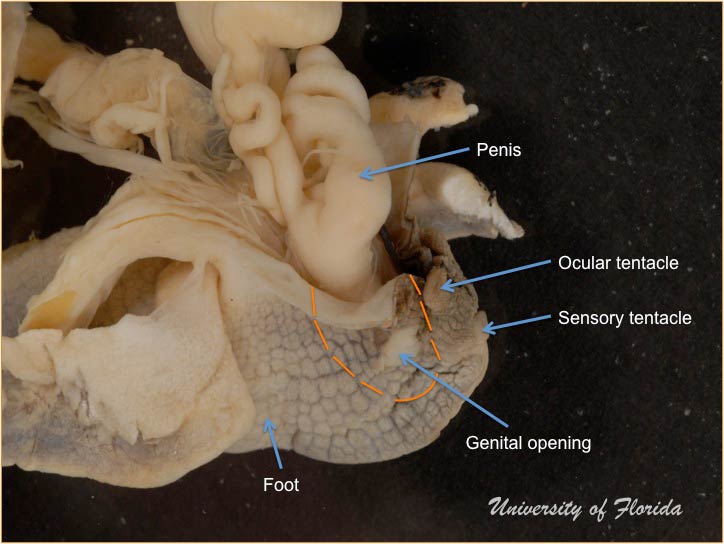
Step 9: detach the reproductive system
Gently separate the reproductive system from the digestive system. Note the genital opening in Figure 22. Make incisions along the broken lines
as indicated in Figure 22. Be careful to avoid cutting through the atriumAtrium:
Opening or passage of the genitalia. OR Region for the reception of gametes.
. This incision will detach the entire reproductive system from the
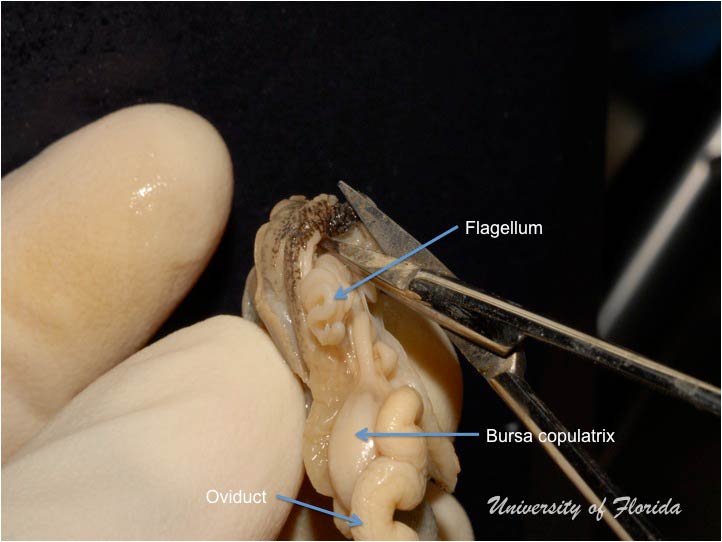
rest of the animal (Figure 23). Use an insect pin to gently unravel the vas deferens, bursa copulatrix, oviduct, flagellum, and penis by
following the connection to each.
-
Figure 22 -
Figure 23
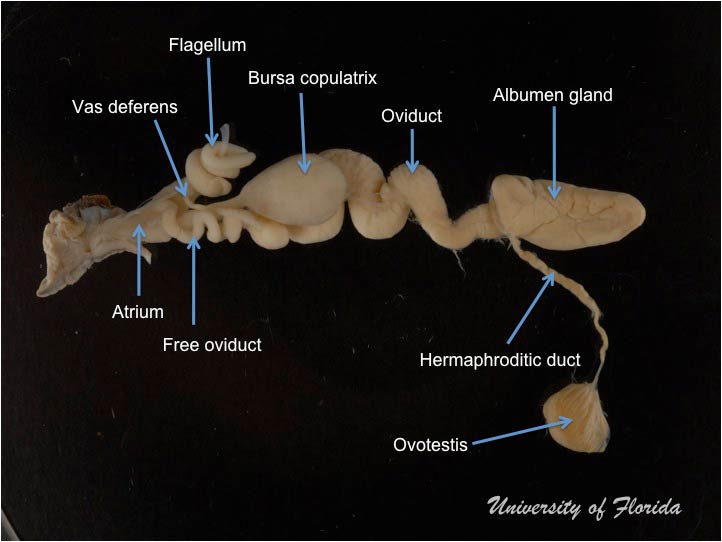
Step 10: treatment for photography
If a photograph of the reproductive system is required, the structures can be arranged and pinned as desired then fixed in place by immersion in 95% ethanol for approximately 15 minutes. DO NOT leave the reproductive structures in 95% ethanol for an extended period as dehydration and distortion will occur. The pins can be removed from the specimen for photography or closer examination.
-
Figure 24 -
Figure 25