Dissection tutorials
Slug dissection
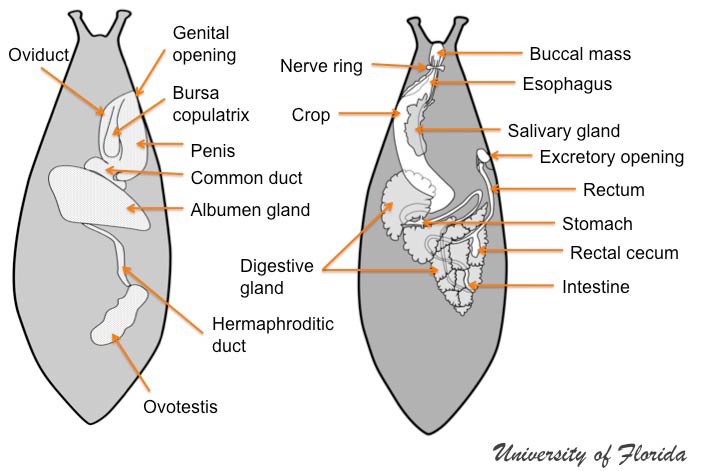
Step 1: Note general location of internal organs (dorsal view).
These are generalized diagrams of the digestive and reproductive systems. Both systems occupy most of the animal and in many cases are closely associated. Please note that the size, location and relative position of the reproductive organs may vary depending on the species.
-
Figure 1
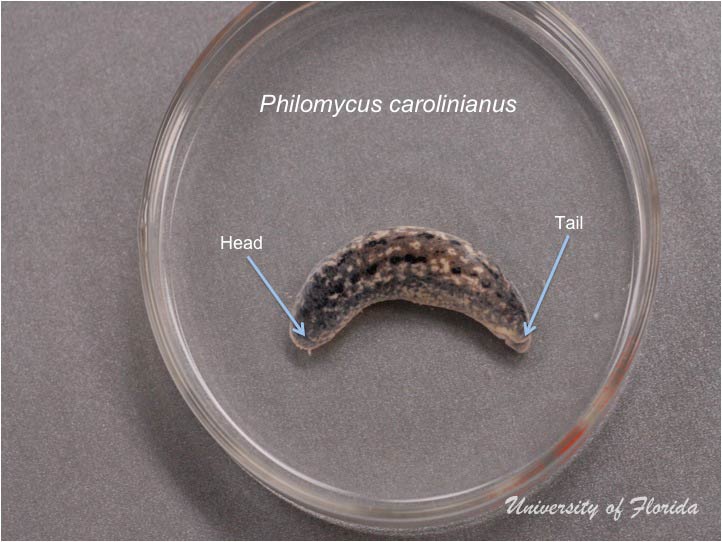
Step 2: Orient the specimen.
Photograph of a freshly preserved animal. Submerge the relaxed, extended adult specimen in a dish with 75% ethanol or water. Note the headHead:
The area of a mollusc's body that has the tentacles, eyes and mouth.
and tail region of the animal, as the specimen will appear different after removal of the body covering or mantleMantle:
A fleshy, membranous covering of the anterior portion of the body of a mollusc. It secretes the materials that form the shell.
. For humane purposes, ensure that the animal is completely unresponsive to touch before initiating the dissection. See supplies section on how to relax the specimen.
-
Figure 2
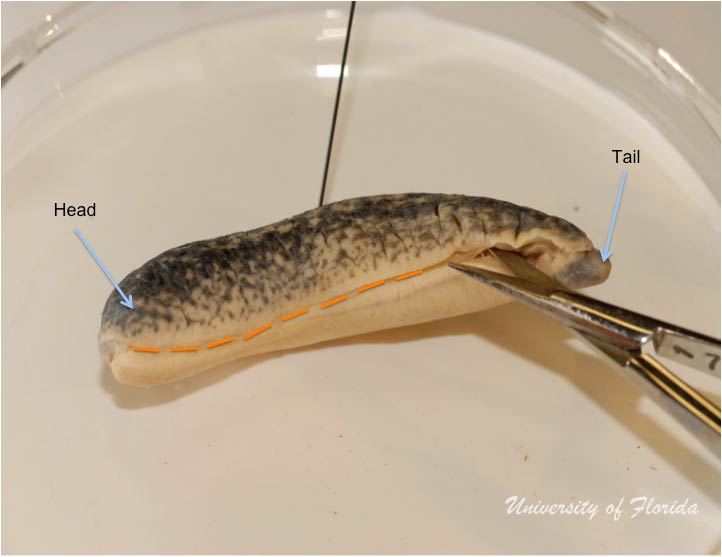
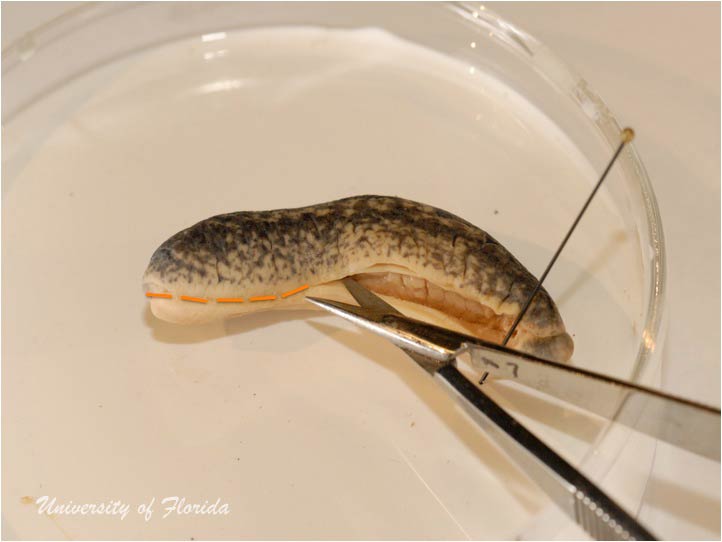
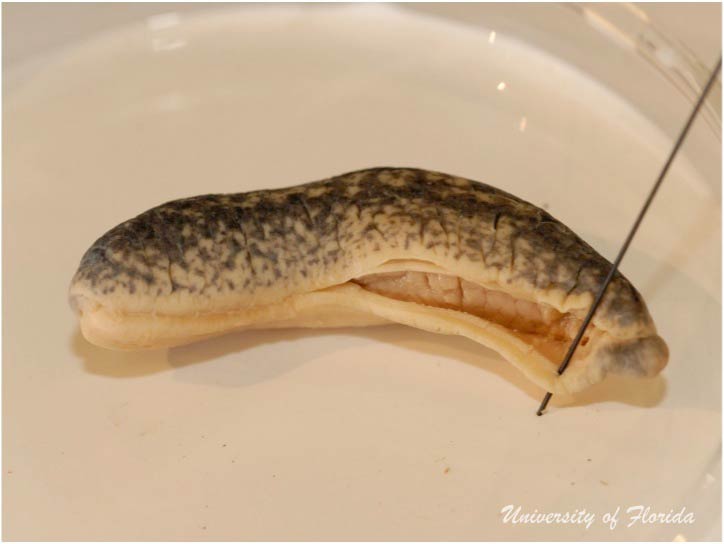
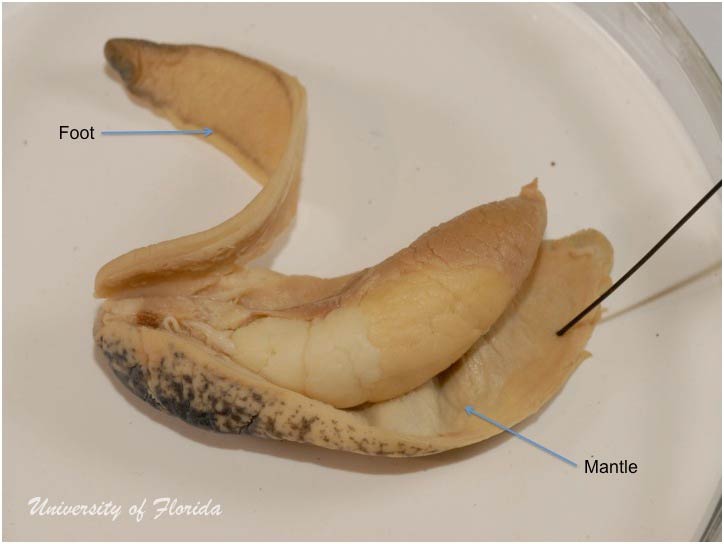
Step 3: Remove the foot of the animal by cutting along the sole
Make a shallow incision near the tip of tail using a pair of sharp dissecting scissors. Angle scissors upwards and proceed with the incision along the footFoot:
The muscular organ on the undersurface of the body of a mollusc upon which the animal rests or uses to crawl.
of the animal. The incision should be made just above the footFoot:
The muscular organ on the undersurface of the body of a mollusc upon which the animal rests or uses to crawl.
fringe, grooveGroove:
An elongate and fairly uniform depression or indentation in the shell or soft parts of a mollusc.
, or where the body or mantleMantle:
A fleshy, membranous covering of the anterior portion of the body of a mollusc. It secretes the materials that form the shell.
of the animal meets the footFoot:
The muscular organ on the undersurface of the body of a mollusc upon which the animal rests or uses to crawl.
. Cut towards the headHead:
The area of a mollusc's body that has the tentacles, eyes and mouth.
of the animal (on both sides) to remove the entire footFoot:
The muscular organ on the undersurface of the body of a mollusc upon which the animal rests or uses to crawl.
.
-
Figure 3 -
Figure 4 -
Figure 5 -
Figure 6 -
Figure 7 -
Figure 8 -
Figure 9
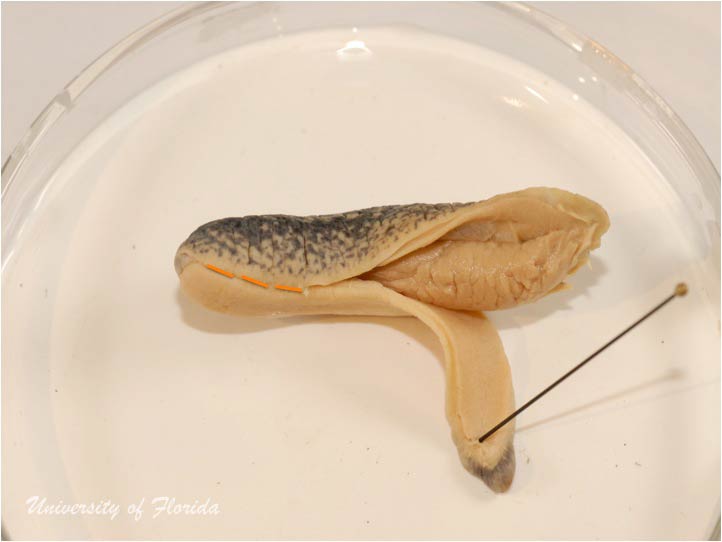
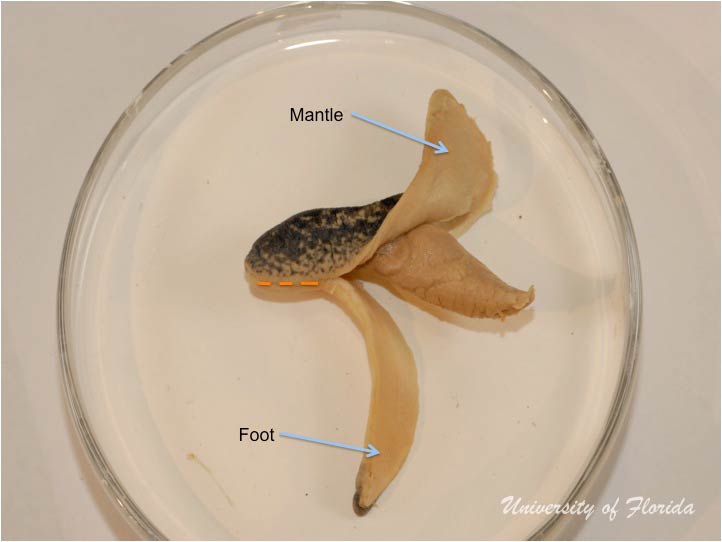
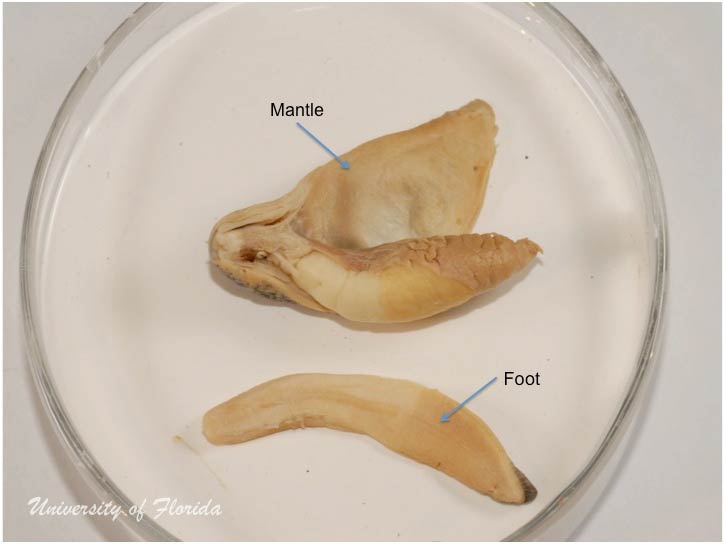
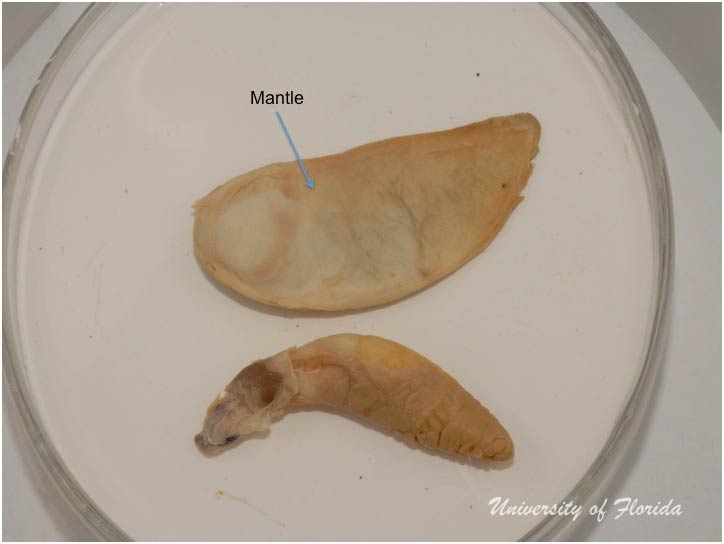
Step 4: Remove the body covering and/or mantle of the animal
Gently peel the body or mantleMantle:
A fleshy, membranous covering of the anterior portion of the body of a mollusc. It secretes the materials that form the shell.
back to expose the contents of the animal. Begin at the tip of the tail and work towards the headHead:
The area of a mollusc's body that has the tentacles, eyes and mouth.
. Be sure to cut between the body or mantleMantle:
A fleshy, membranous covering of the anterior portion of the body of a mollusc. It secretes the materials that form the shell.
and the heart to remove the body covering. Also, make incisions along the margin of the footFoot:
The muscular organ on the undersurface of the body of a mollusc upon which the animal rests or uses to crawl.
, to avoid cutting internal organs and eyestalks. Remove the body covering or mantleMantle:
A fleshy, membranous covering of the anterior portion of the body of a mollusc. It secretes the materials that form the shell.
.
-
Figure 10 -
Figure 11
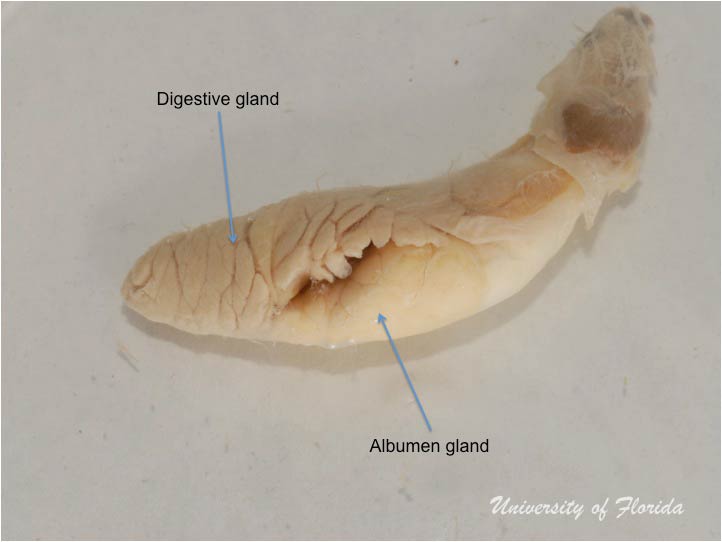
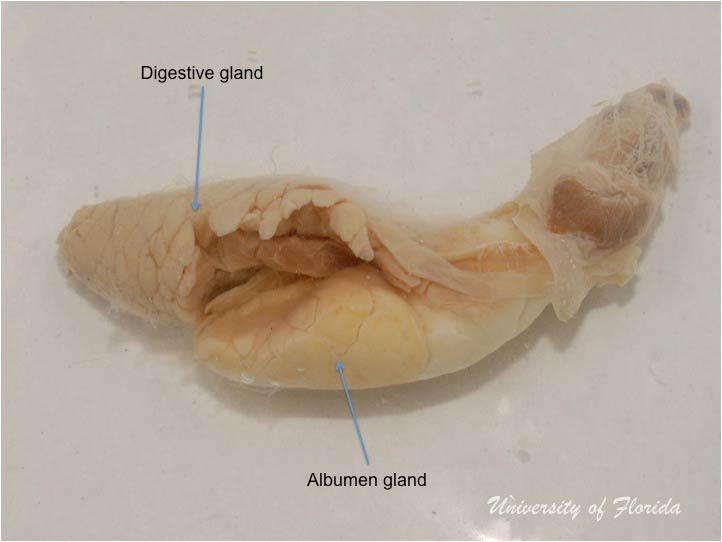
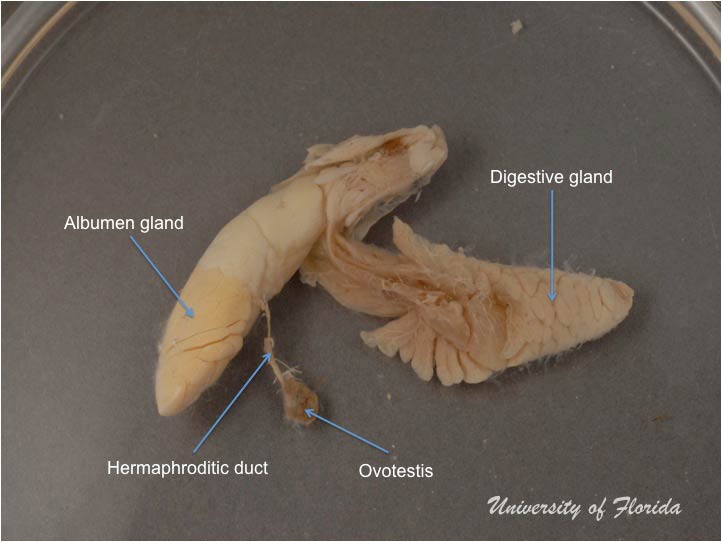
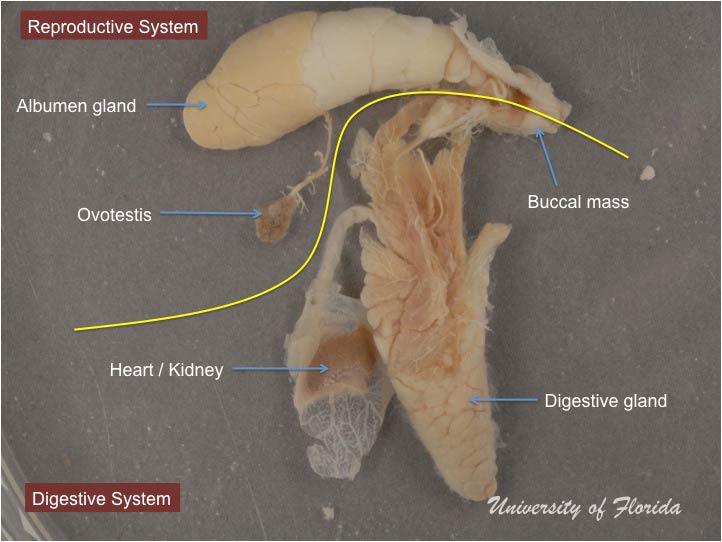
Step 5: Separate the digestive gland from the albumen gland
Separate the digestive system from the reproductive system by gently peeling away the digestive gland from the albumen gland.
-
Figure 12 -
Figure 13
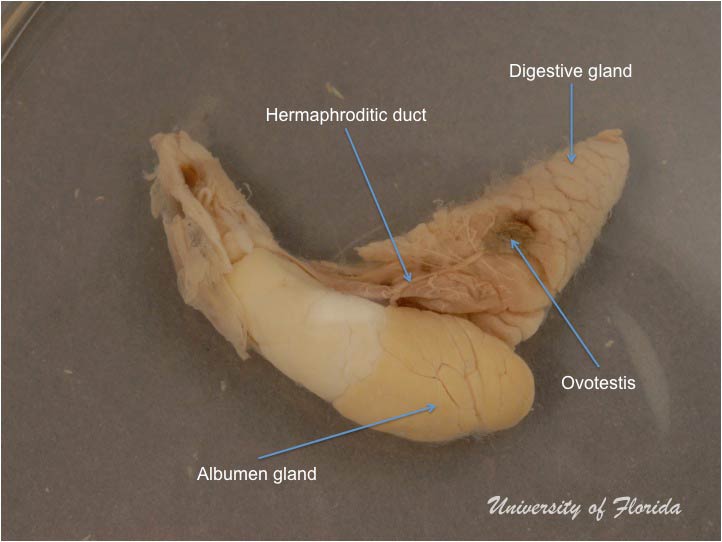
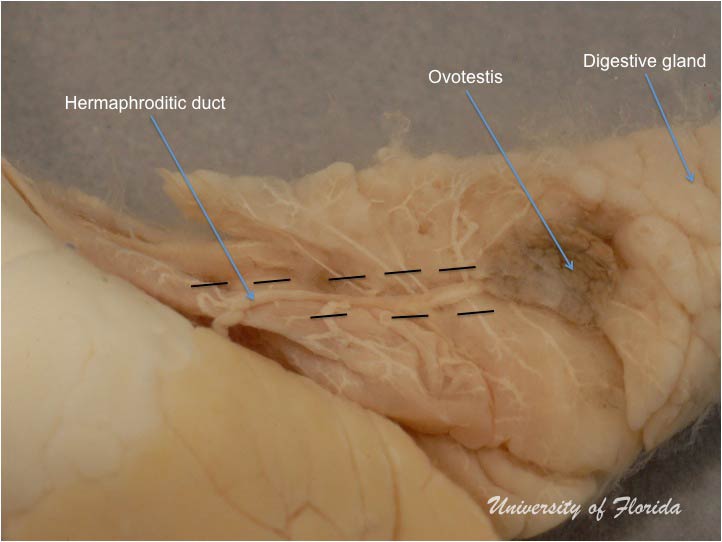
Step 6: Remove the ovotestis from the digestive gland
Gently remove the areas of the digestive gland that cover the ovotestis. The ovotestis is often embedded in the digestive gland but is easily identified, as it is typically a different color (or shade). Make incisions along the sides of the hermaphroditicHermaphroditic:
State of having both male and female reproductive organs. (See also Hermaphrodite)
duct (Figure. 14) to remove all lateral connections to the digestive gland. The animal may need to be inverted for these steps.
-
Figure 14 -
Figure 15 -
Figure 16
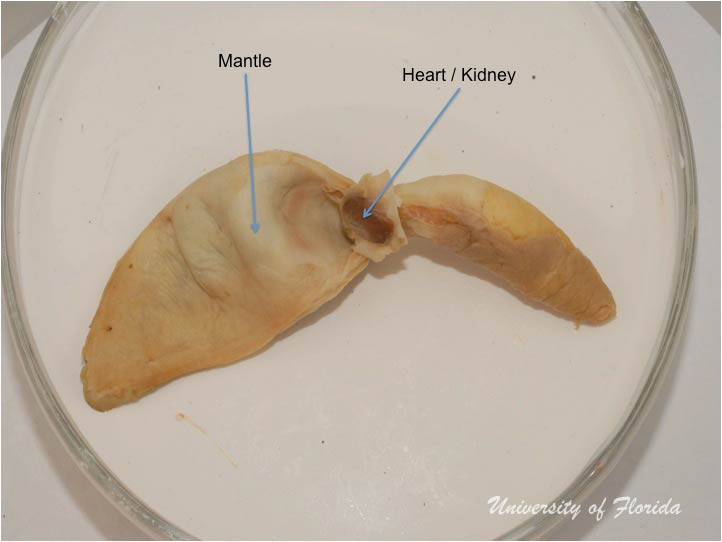
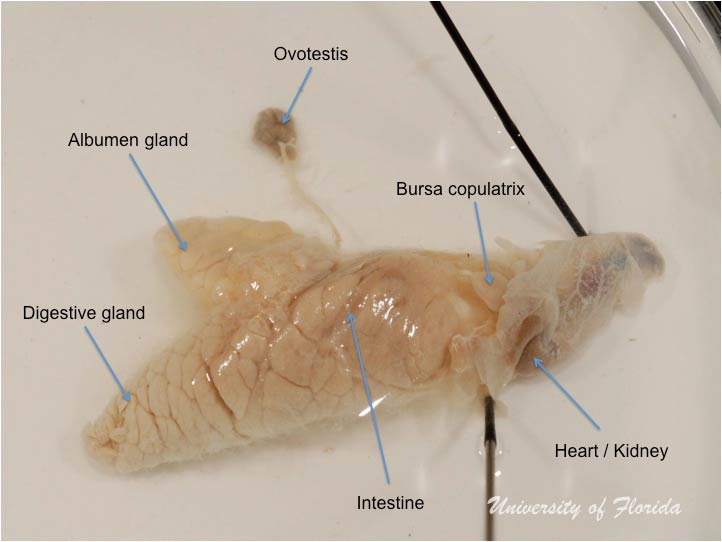
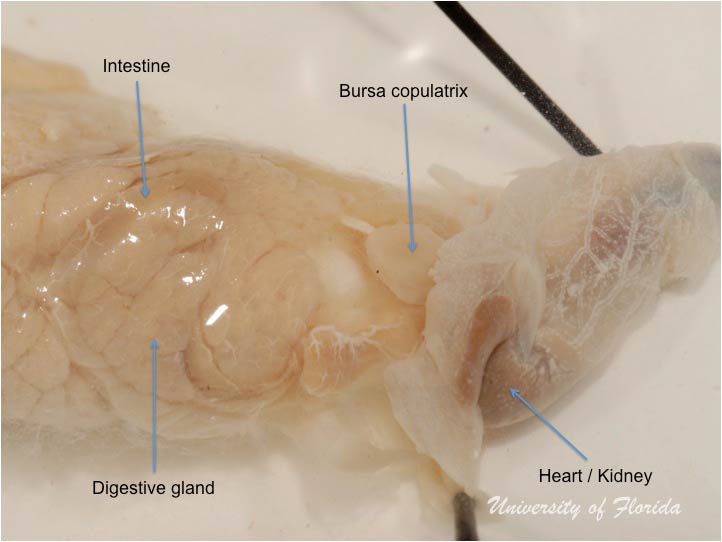
Step 7: Remove heart and kidney to reveal bursa copulatrix
Gently remove the heart and kidney to reveal the bursa copulatrix and headHead:
The area of a mollusc's body that has the tentacles, eyes and mouth.
region (including the optic region).
-
Figure 17 -
Figure 18 -
Figure 19
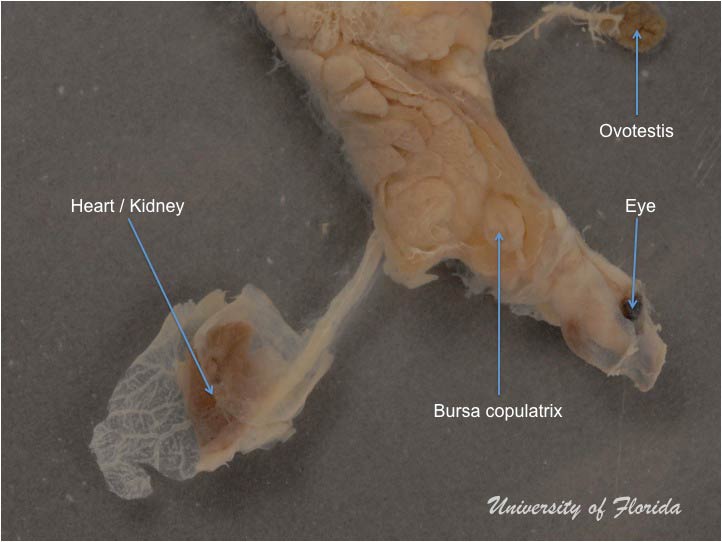
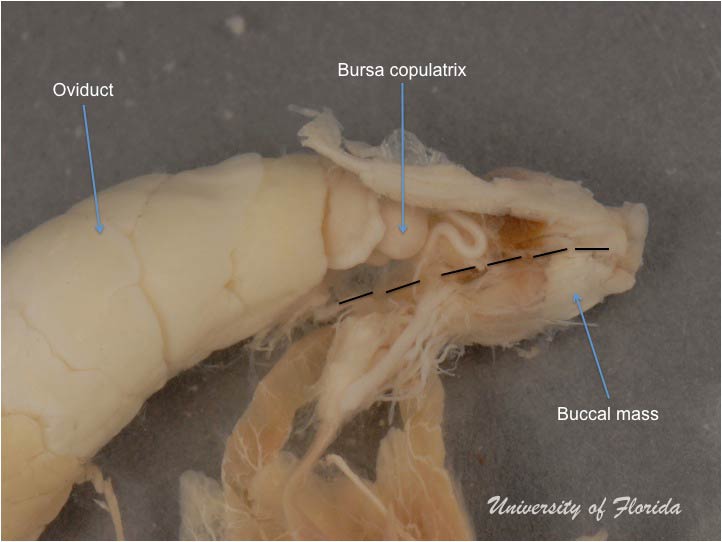
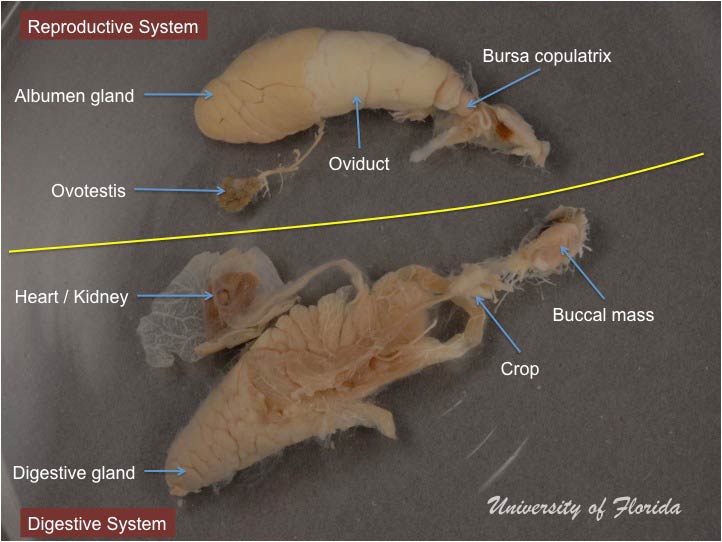
Step 8: Separate the reproductive system from the digestive system
Orient the animal as illustrated in Figure 19 so that the reproductive system is above the digestive system. Tweezers can then be used to either pull the two systems apart along the dashed lines (Figure. 21) OR the structures can be slowly teased apart beginning at the buccal mass (removing the eye stalks and crop).
-
Figure 20 -
Figure 21 -
Figure 22
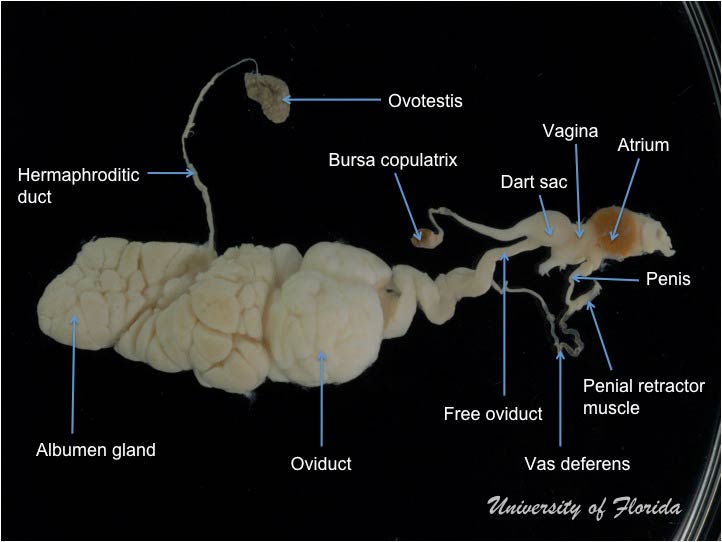
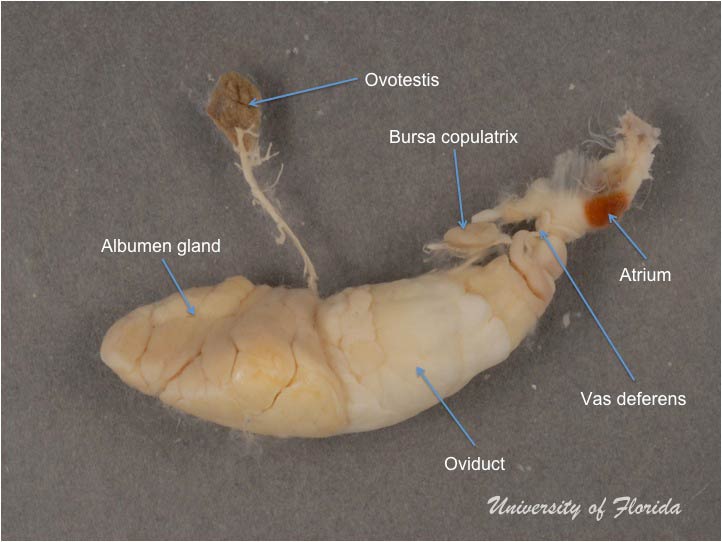
Step 9: detach the reproductive system
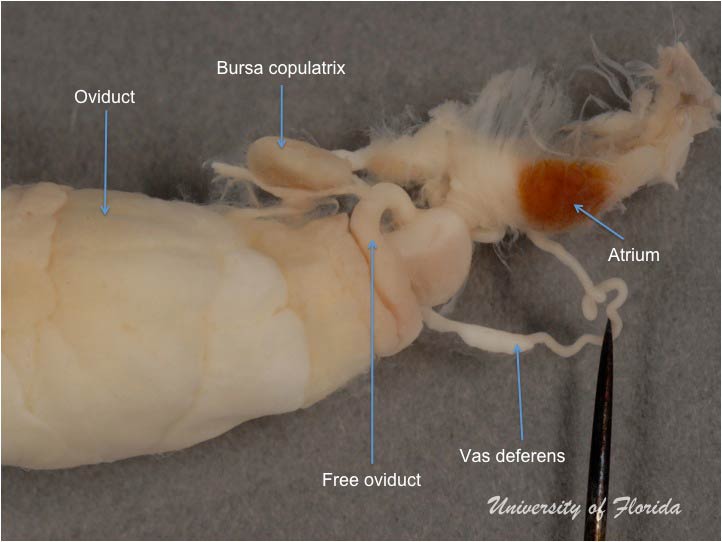
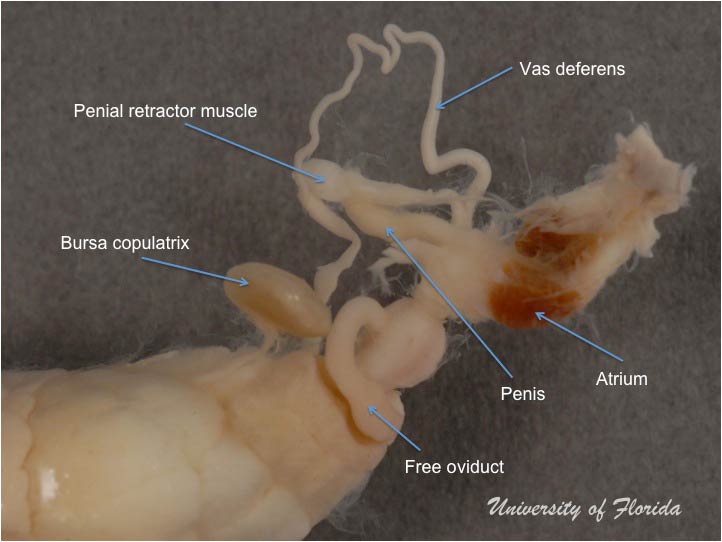
Figure 23 displays the entire reproductive system of the animal. The structures are compressed and intertwined at this stage and need to be teased apart. Please note: the red color of the atriumAtrium:
Opening or passage of the genitalia. OR Region for the reception of gametes.
is not common to all slugs. Use an insect pin to gently unravel the vas deferens, bursa copulatrix, oviduct, and penis by following the connection to each.
-
Figure 23
Step 10: treatment for photography
If a photograph of the reproductive system is required, the structures can be arranged and pinned as desired then fixed in place by immersion in 95% ethanol for approximately 15 minutes. DO NOT leave the reproductive structures in 95% ethanol for an extended period as dehydration and distortion will occur. The pins can be removed from the specimen for photography or closer examination.
-
Figure 26 -
Figure 27