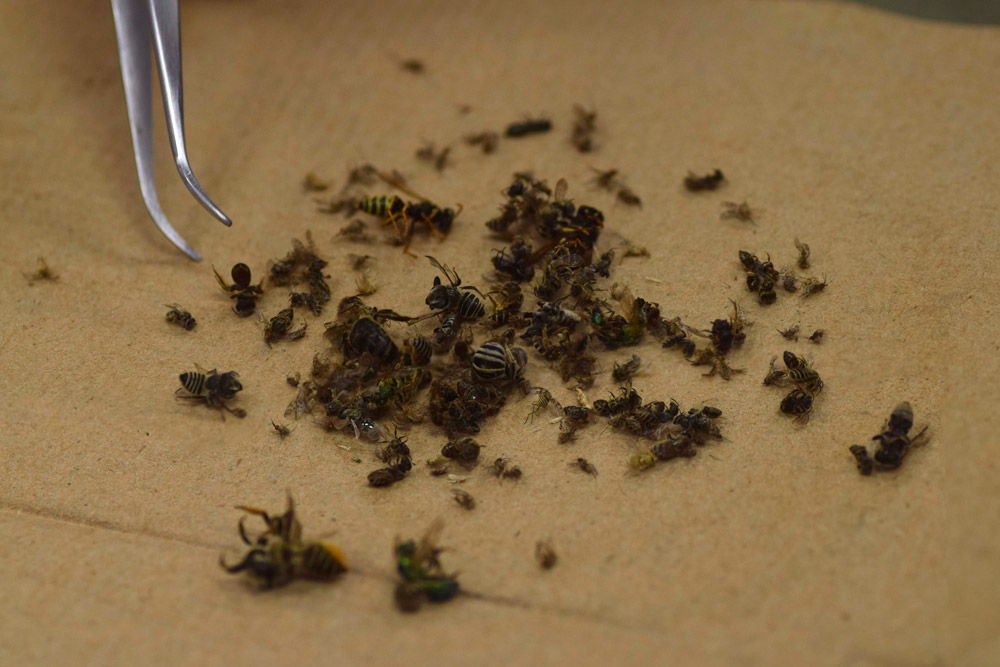
Bee specimen preparation is an important step before identification can occur. Many bees have diagnostic features that can be difficult to see if the specimen is not properly prepared, and poorly washed bees can lead to difficult or impossible species determination.
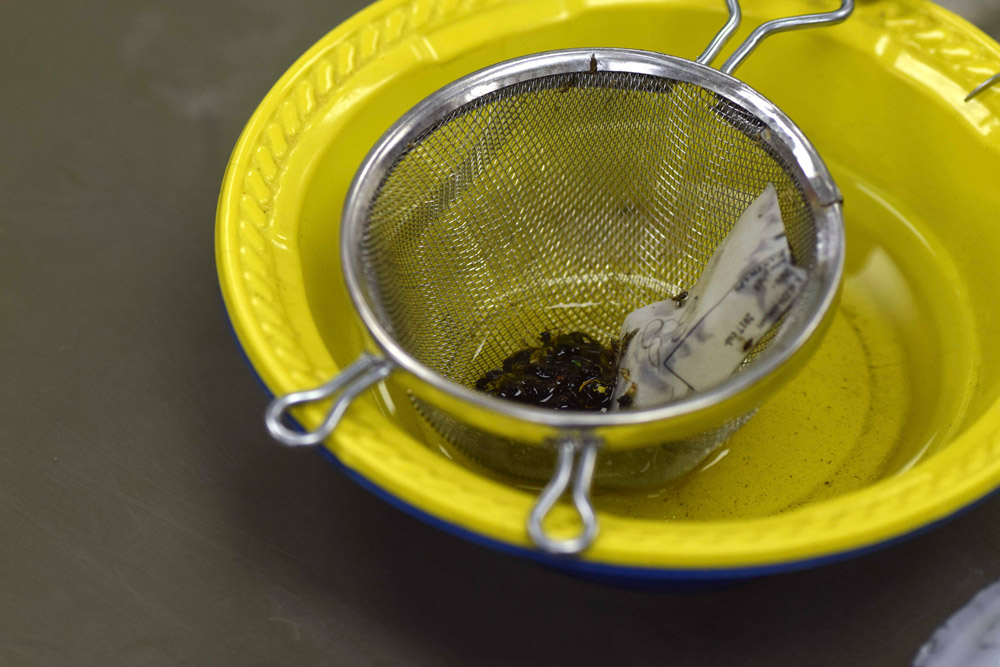
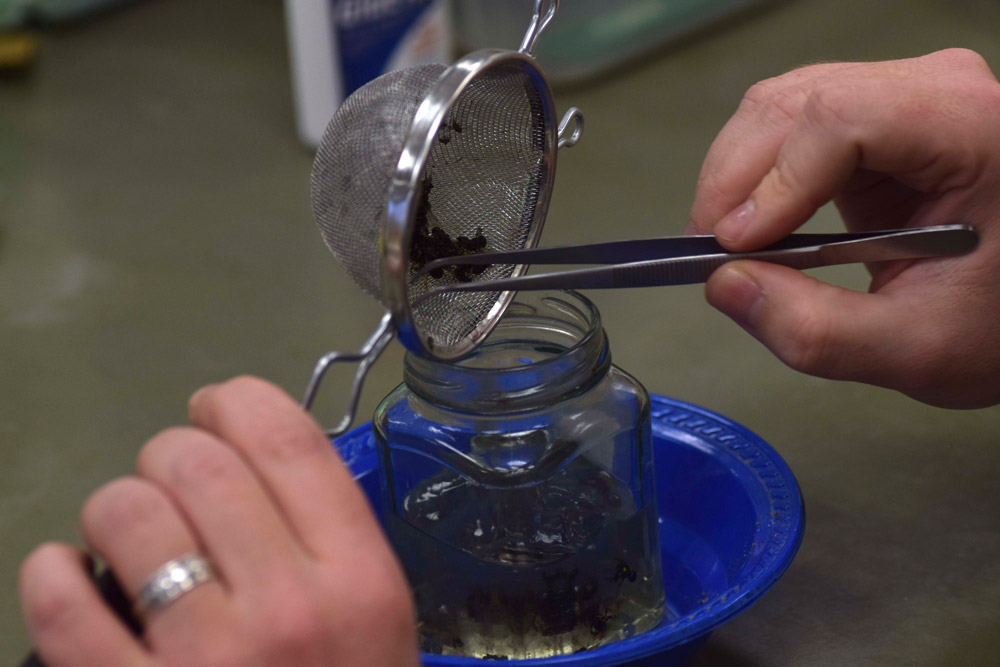
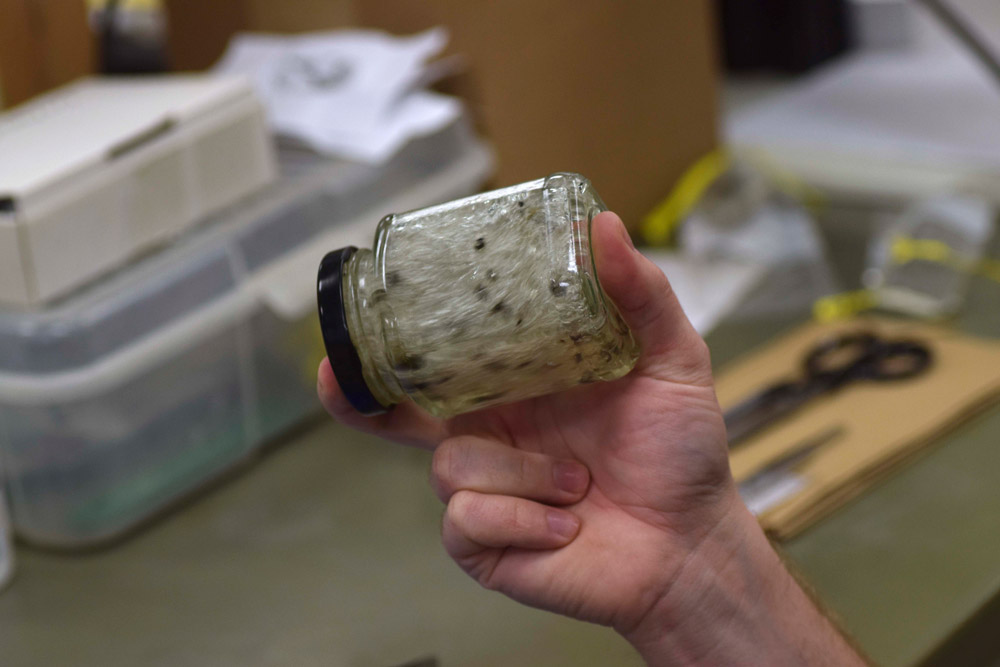
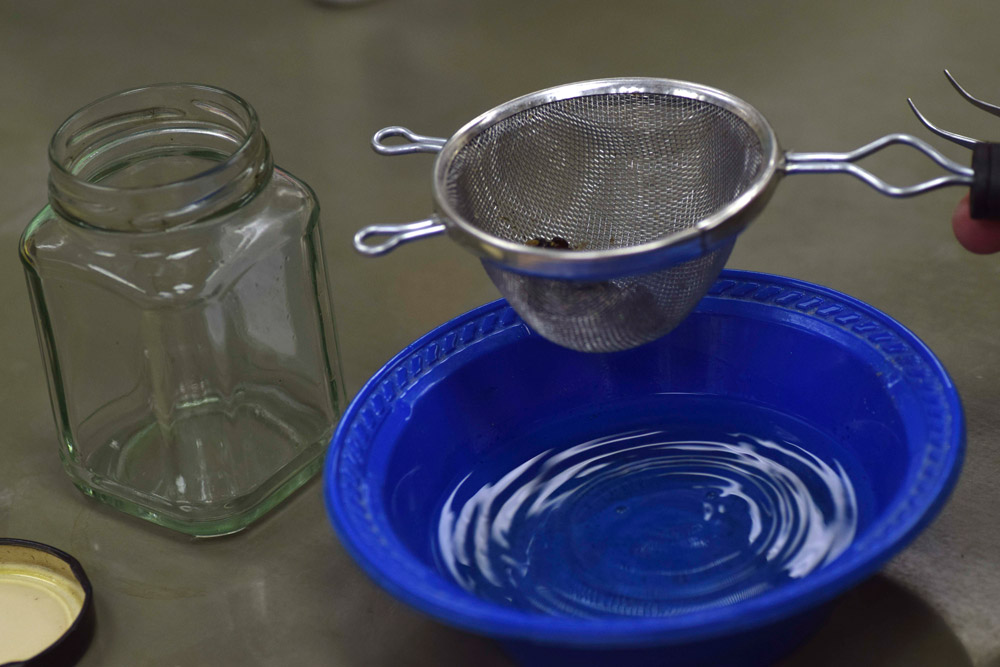
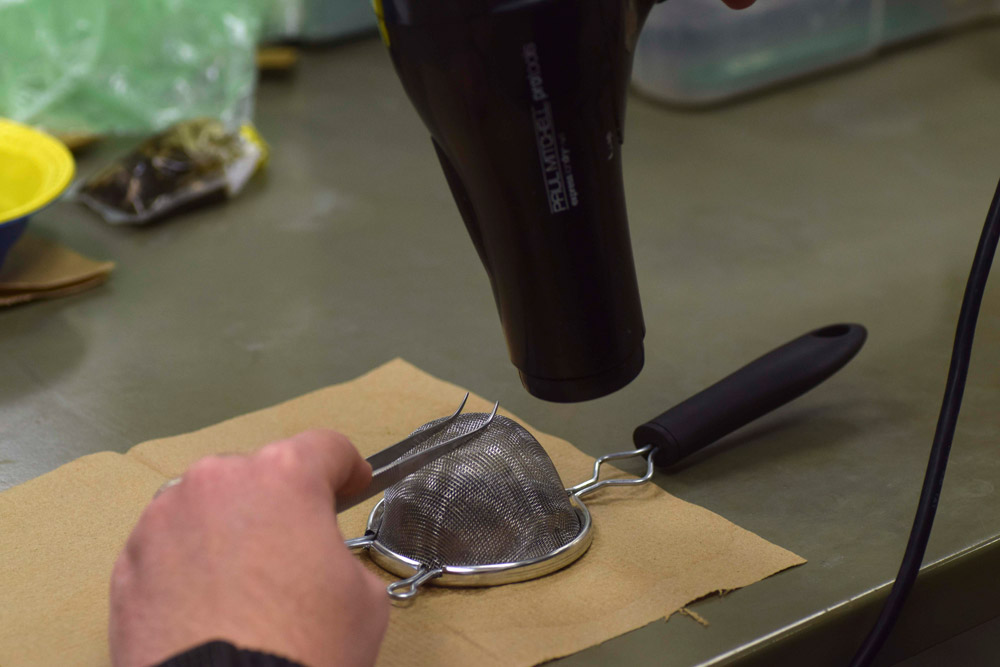
Net collected bees often do not need to be washed before pinning and are best pinned into boxes within 24 hours of collection. After 24 hours, specimens become brittle and difficult to pin without breaking. If you are unable to process net collected bees immediately, then the next best option is to store them in 70% ethanol. Ethanol will keep bees from becoming brittle. Further, it is important that ethanol, not isopropanol, be used if the bee is being used for DNA extraction. Bees that were collected by other means (pan or malaise traps) should be washed before pinning (see below).
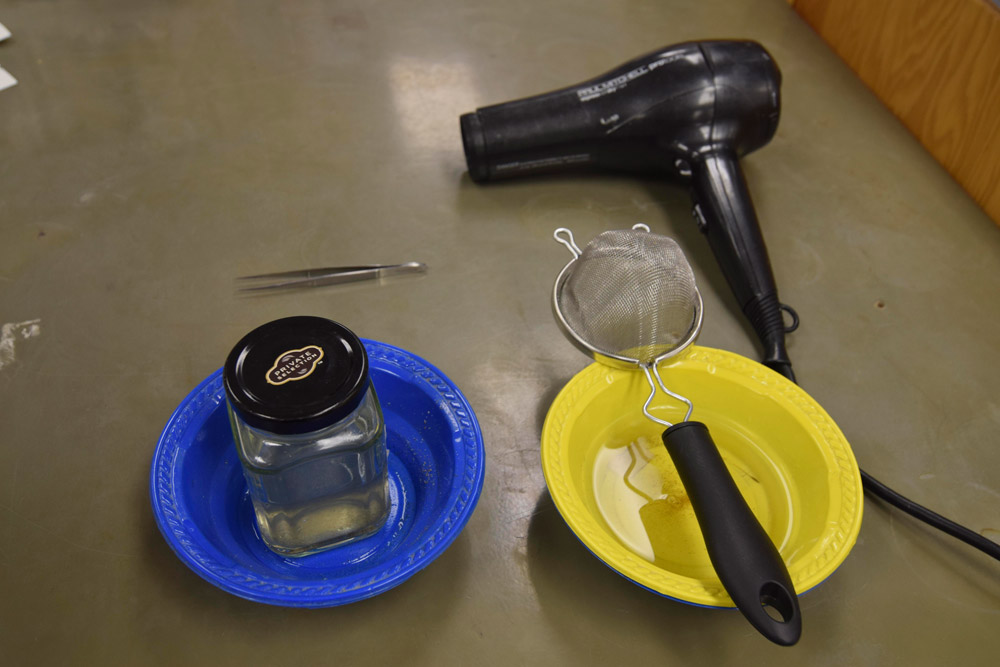
You will need the following:
Procedures (all photos below taken by Chelsey Ritner):
If your bee is freshly caught, or recently processed out of storage in alcohol, you should be able to pick it up and easily manipulate it with your hands without breaking it. Holding the bee between the thumb and forefinger is the easiest way to keep the bee from moving around too much while you pin it.
In most cases #2 black enamel pins work well for bees. #1 pins and lower are very thin and can often bend when trying to pin through labels or even when putting the pin into pinning boxes. If a bee is small enough that you think it may require a smaller pin than a #2, it is best to glue it to the pin (see “Gluing small bees” below).
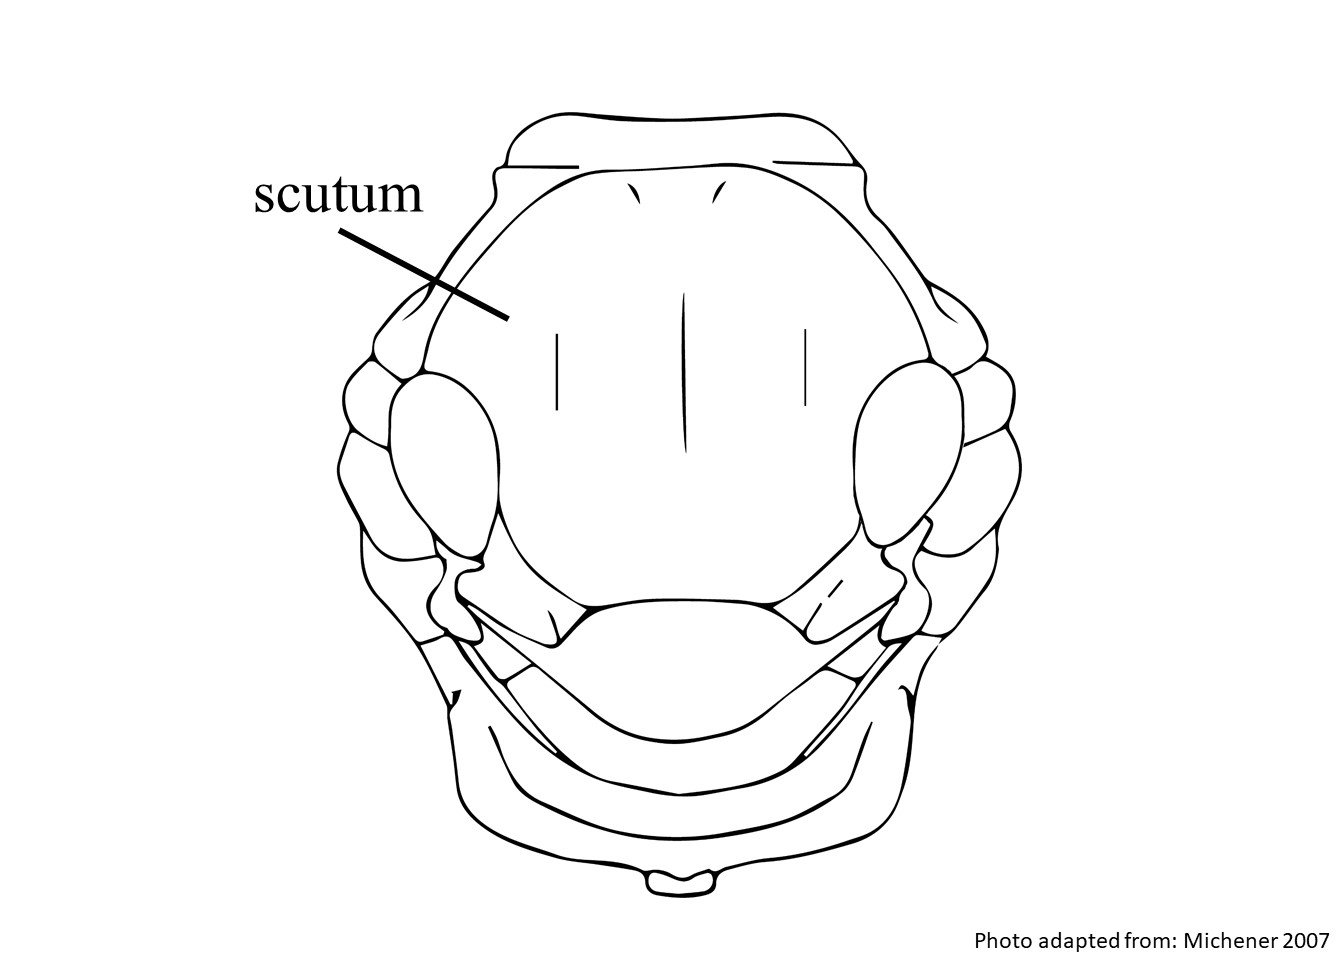
Bees should be pinned through the top right corner of the scutumscutum:
the large segment on top of the thorax located between the wings and behind the head
 . Bees are bilaterally symmetrical. Therefore, if you make sure to keep the pin to the right side of the scutumscutum:
the large segment on top of the thorax located between the wings and behind the head
, the important diagnostic features on the left side will be visible and unaltered. If the bee is too small to pin without crossing the midline of the scutumscutum:
the large segment on top of the thorax located between the wings and behind the head
, it is best to glue the bee to the pin or a point (see below). It is best to pin the bee at a height that allows you to grip the pin without hitting the bee with your fingers, yet still allows space beneath the specimen to place labels with collection and identification information. Approximately ?” from the scutumscutum:
the large segment on top of the thorax located between the wings and behind the head
and the top of the pin is often sufficient, but some bees have very long antenna and require a bit more space at the top of the pin to be handled safely.
Gluing bees can take time, but it becomes easier with practice. Use a thick, tacky glue (e.g., Elmer’s wood glue) to keep the bee from sliding down the pin before the glue is dry. Place a small amount of glue on the pin at the height where the bee will be mounted. Spin the pin around in the glue so that the glue goes all the way around the pin. This gives the glue a more secure hold on the pin and prevents the bee from falling off if the pin gets flicked. Glue your bee to the pin on the right side of its thorax.
There are many identifying features that can be be hidden when a bee is mounted. For this reason, it is helpful to spread the wings, mandibles (this is particularly true in Megachile), and legs when pinning bees. In males, genitaliagenitalia:
all the genital structures collectively
and sternal structures can often be diagnostic, and it may be necessary to extend the abdomen. Using a humid chamber to relax older specimens can make it easier to move the bee without breaking it, so these features can be seen. It is, however, much easier to do this when initially pinning the specimen and it moves more freely. Mandibles can be spread by using forceps to pry them open. The wings, legs, and abdomen can be moved where desired while mounting and held in place using additional pins. Once the bee dries, often a few days after mounting, the additional pins can be removed, and the features should stay in place.
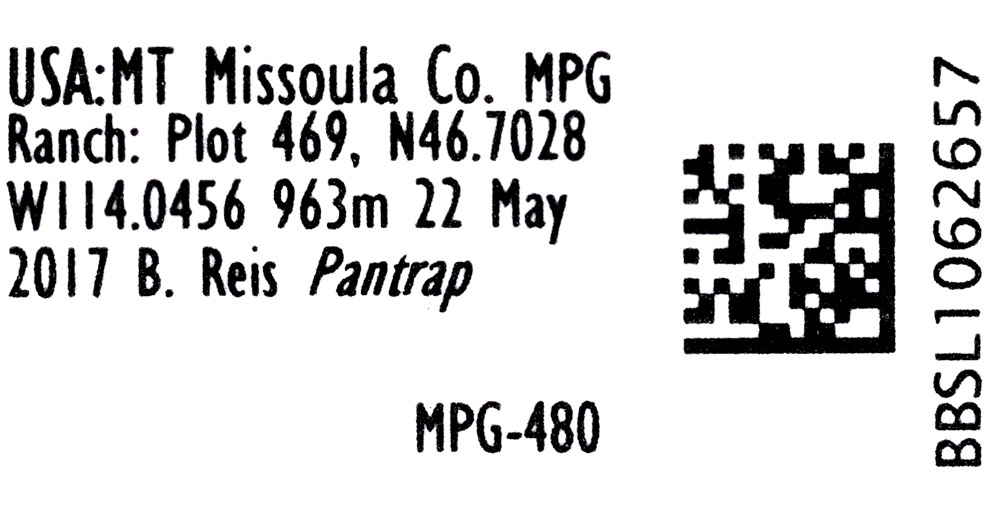
The scientific value of insect specimens depends on the information collected, such as date, locality of capture, associated habitat, or plant on which the specimen was found (Triplehorn and Johnson 2005). Insect specimens should always include a label indicating, at minimum, the location and date of collection, but the collection of additional data is preferred. Ideally, the label should follow this format and order: geographical coordinates, collecting locality, date of collection, name of collector, collecting method, and habitat or behavioral notes. Location labels are typically placed below the specimen on the pin, and the identification label is put below the locality label.
Note that many of the methods described above are outlined or explained in greater detail in Droege 2015Droege 2015:
Droege, S. 2015. The Very Handy Manual: How to Catch and Identify Bees and Manage a Collection. USGS Native Bee Inventory and Monitoring Lab ( https://www.pwrc.usgs.gov/nativebees/Handy%20Bee%20Manual/The%20Very%20Handy%20Manual%20-%202015.pdf ). and Wilson and Carril 2016Wilson and Carril 2016:
Wilson, J.S. and O.M. Carril. 2016. The Bees in Your Backyard: A Guide to North Americarsquo;s Bees. Princeton University Press, Princeton and Oxford, 288 pp. (under How to Study Bees).
Authors: S. Burrows, C. Ritner, M. Christman, L. Spears, A. Smith-Pardo, S. Price, R. Ramirez, T. Griswold, A. Redford
Edition 3 - last updated November 2021
tool images at ITP Node
idtools.org