How to Use the Keys
Choosing a key
If you are absolutely sure that your unknown disseminule is a grass (i.e., a member of the Poaceae) then you can go directly to the Grass Key, although a refresher course on grass disseminules and terminology is recommended.
If you are unsure whether or not your unknown is a grass, don't worry. The General Key includes some of the odd grasses as well as appropriate links to the Grass Key for the rest of the Poaceae members of this tool. Again, before going to the General Key, you may want to refresh yourself on non-grass disseminules and terminology.
Differences in how the keys work
The keys were created each a little differently because of the large numbers of entities and character states, particularly in the General Key. They are hybrid keys that include visual recognition of oddities, hierarchical arrangements of characters, evolutionary character sets and the more simplistic Lucid character matrices. Because of the differences in and between these keys, it's highly recommended that you go through the two tutorials below.
Opening and using the General Key
The key will take some time to load—be patient. If the key does not open, check System requirements for possible problems.
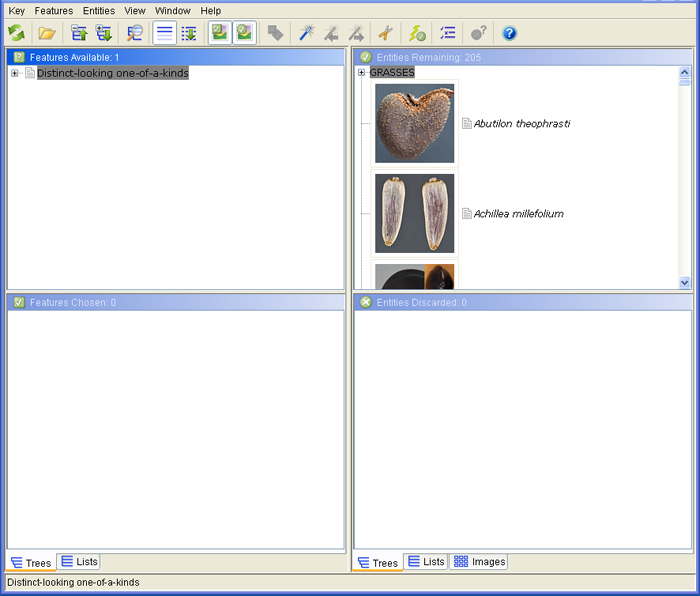
When opened correctly, the key should look like the following diagram (Figure 1).
Figure 1.
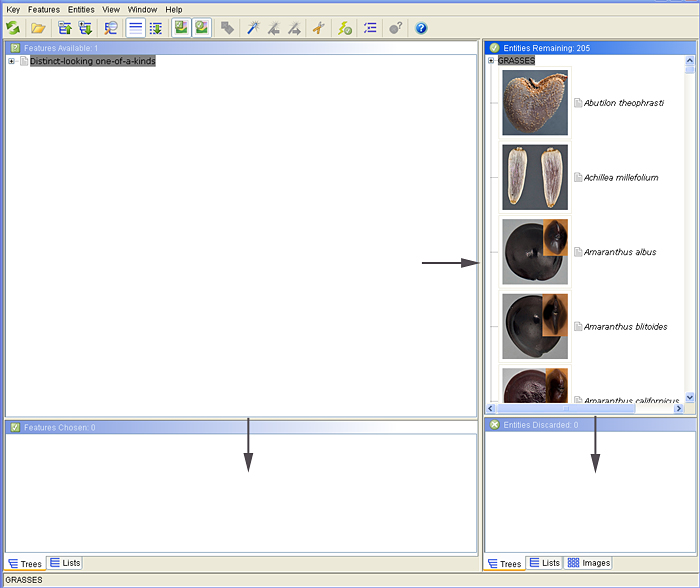
Grab the internal borders between the four windows (see arrows below) and move them so that Features Available takes up most of the working space (Figure 2).
Figure 2.
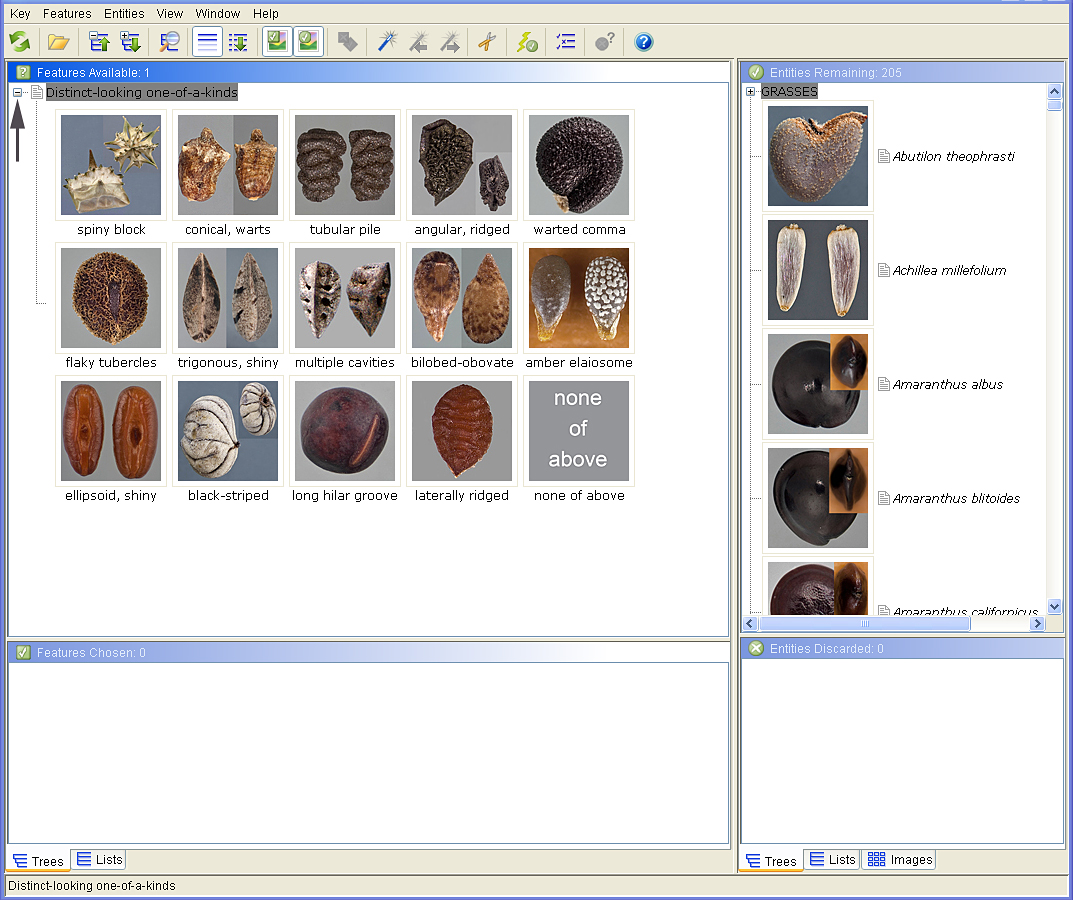
Clicking on the box with the plus (+) in it in the Features Available window (Figure 3) will open up that character (feature or category) and reveal your choices. For features and categories, the choices are called states. If only a single character is available for consideration (as in this example), you must choose one of the states in order to move on to more characters.
Figure 3.
When you click on a feature or category state, the frame around that selection will turn from gray to black, the state will appear in the Features Chosen window below, entities will be discarded and placed in the Entities Discarded window as appropriate, and the next character(s) will appear in the Features Available window (Figure 4).
Figure 4.
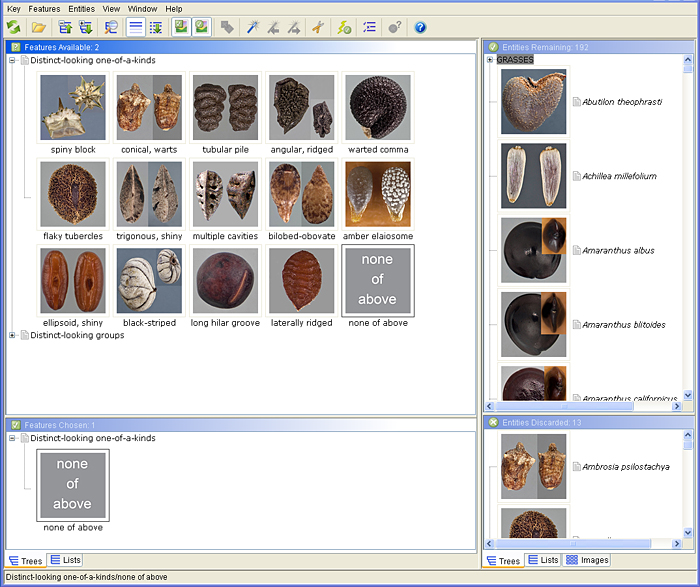
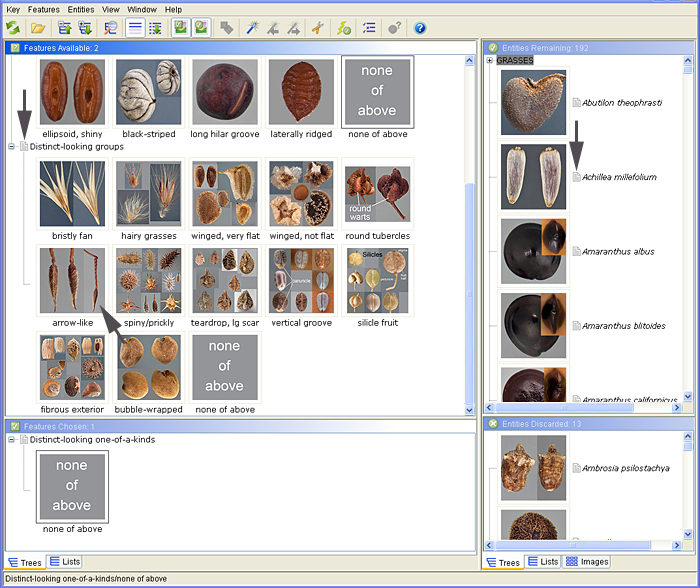
In this key, the second character to appear is the category called “Distinct-looking groups” (Figure 5). To learn more about what constitutes each of the group states, click on the attached information sheet (left arrow) or hover over the lower-right corner of a group until an enlarge icon appears and click on that (middle arrow). Not only will a larger version of the group's thumbnail appear, there will be information on whether or not it is appropriate to choose that state. In the Entities Remaining window, clicking on the attached information sheet (right arrow) brings up the appropriate Fact Sheet and, if pertinent, Similar Species Comparison Chart.
Figure 5.
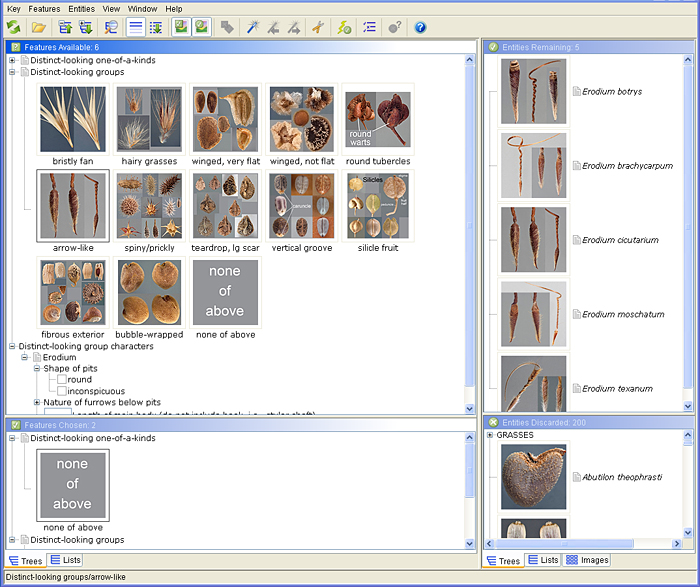
In Figure 6, the state labelled “arrow-like” has been chosen. This caused a new feature line called “Distinct-looking subcharacters” to appear; clicking on the + box and opening that line caused the “Erodium” line to appear; and opening that line caused several features to appear that are important in being able to discriminate among the five species of Erodium in this key.
Figure 6.
Continue to select feature states until only one taxon is left in the Entities Remaining window. If you make a mistake along the way in choosing a feature or category state, you can click on your most recent selection in the Features Available window a second time to deselect it. You can continue to work backwards in this manner until you are back to the choices you made with which you are comfortable. Then, new state choices can be made.
The hierarchical nature of the keys means that features and categories will appear (and be available) or disappear (and be unavailable) depending on your state selections.
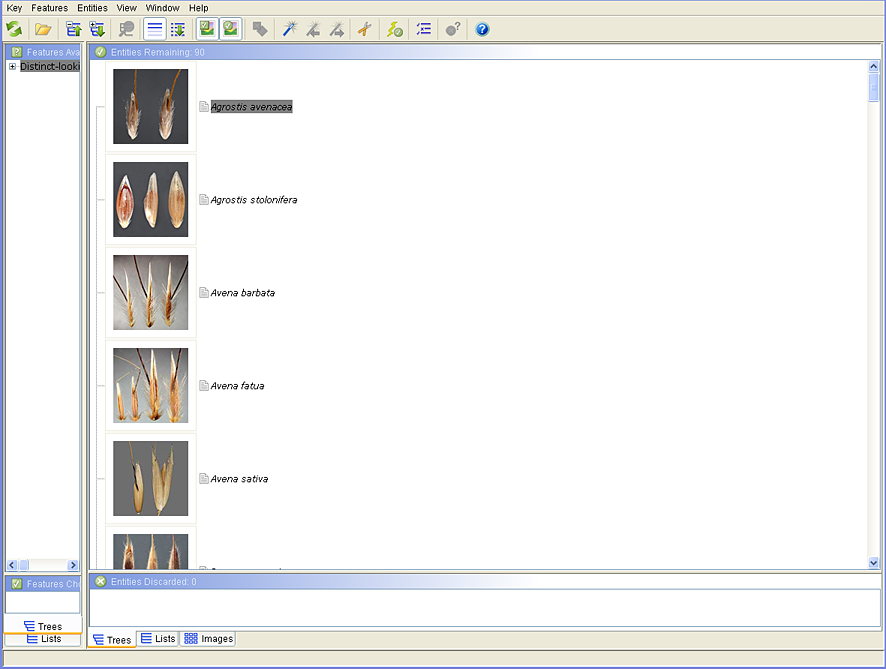
Opening and using the Grass Key
When the Grass Key opens properly it will look similar to Figure 1. If the key does not open, check System requirements for possible problems. Follow procedures in Figures 1–4 above to achieve a window that looks like Figure 7 below.
Figure 7.
All + boxes can be opened at once by clicking the appropriate button in the tool bar (see Figure 8). As with the General Key, some features or their states will have attached information sheets that aid in choosing the appropriate state.
Figure 8.
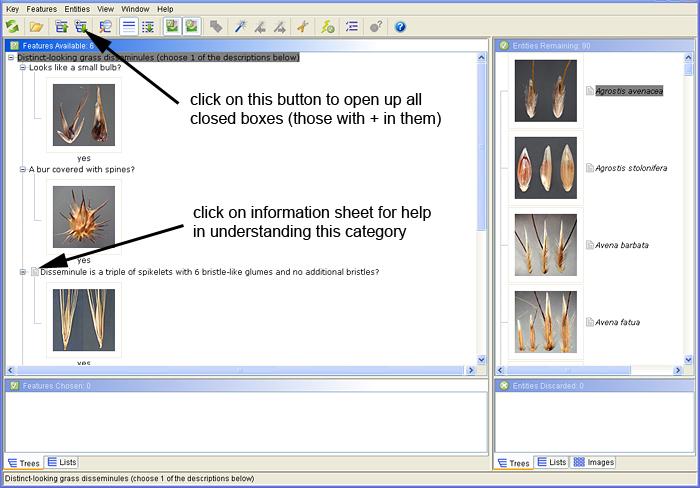
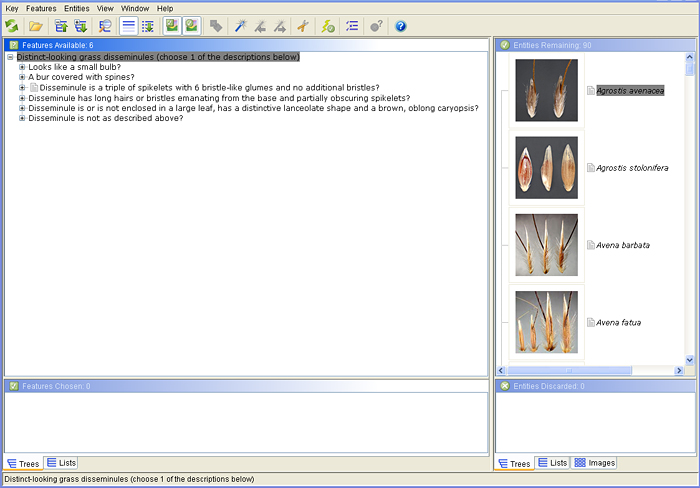
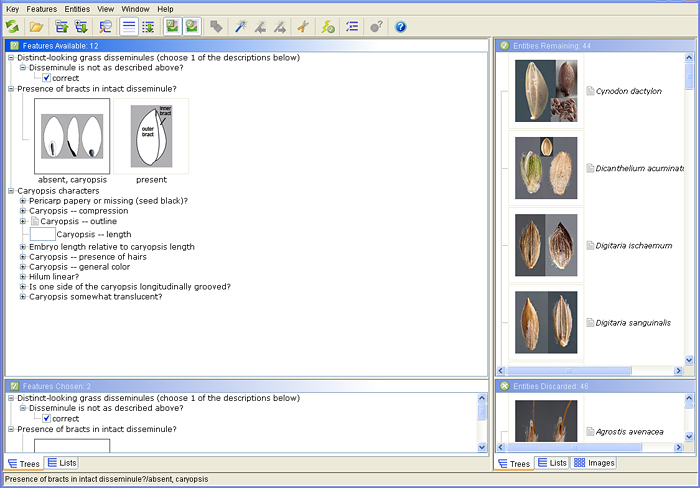
Figure 9 shows that “Disseminule is not as described above?” has been chosen as the appropriate state or category for the first feature,“Distinct-looking grass disseminules”. A second feature then opened up, and the character state chosen for “Presence of bracts in intact disseminule?” was “absent, caryopsis”. This caused a third grouping of features to open up under “Caryopsis characters.” Given the number of caryopsis characters to choose from, this is a situation when it may be easiest to use Lucid's Best Tool to move forward.
Figure 9.
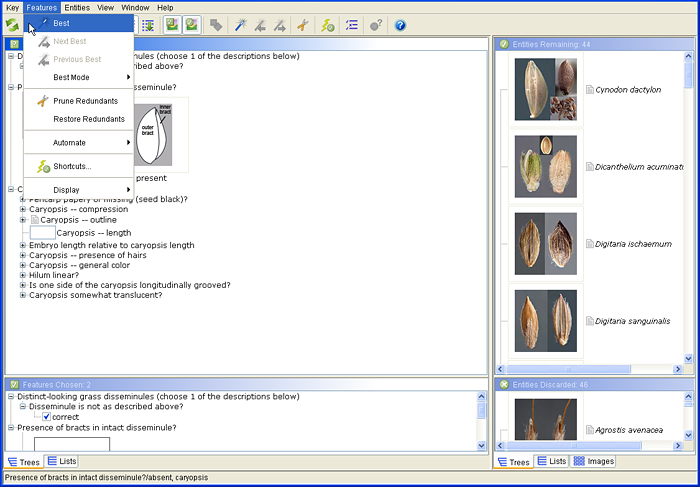
Choose the Best Tool by going to Features on the tool bar and selecting Best (Figure 10). The results will tell you which is the next best feature to address to narrow the field of Entities Remaining. If for some reason, that feature is not one you can easily address, then choose Next Best for the next best feature. These tools help to avoid choosing features that may not have differences among the Entities Remaining.
Figure 10.
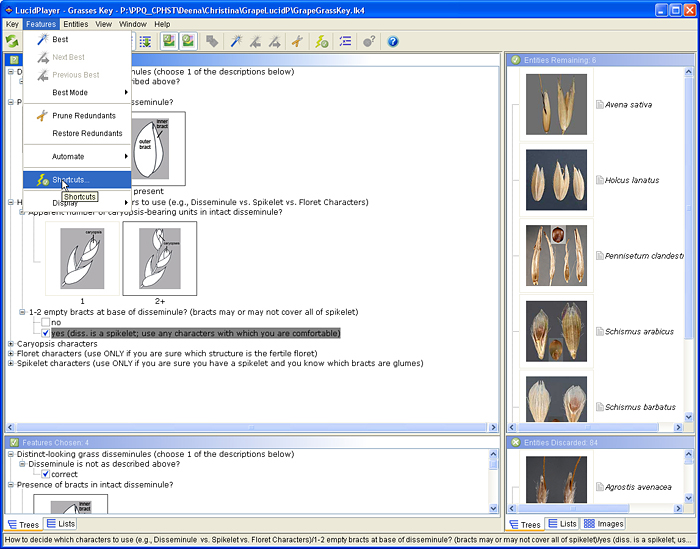
Another way to narrow down the number of potentially valuable features is to use the Lucid Shortcuts Tool (Figure 11).
Figure 11.
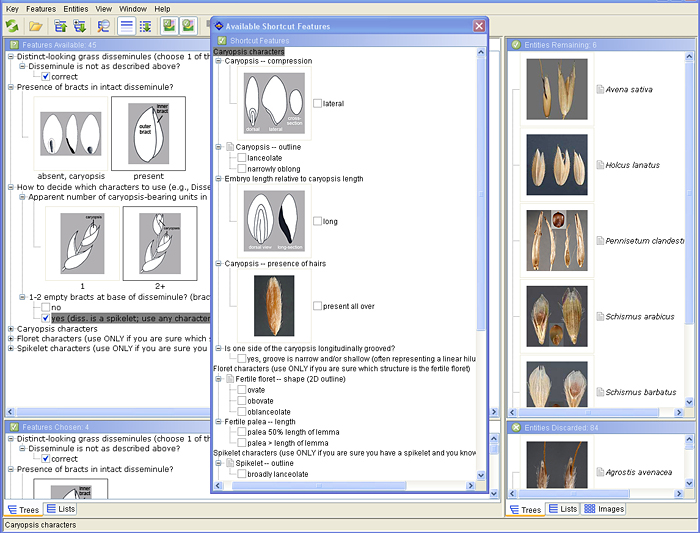
This tool brings up a set of feature states that may be most useful in identifying your specimen. This is particularly important when working with grasses. The Best Tool may bring up a floret character when what you want to work with is a caryopsis character. Again, the Shortcuts Tool presents several distinctive character states (Figure 12).
Figure 12.
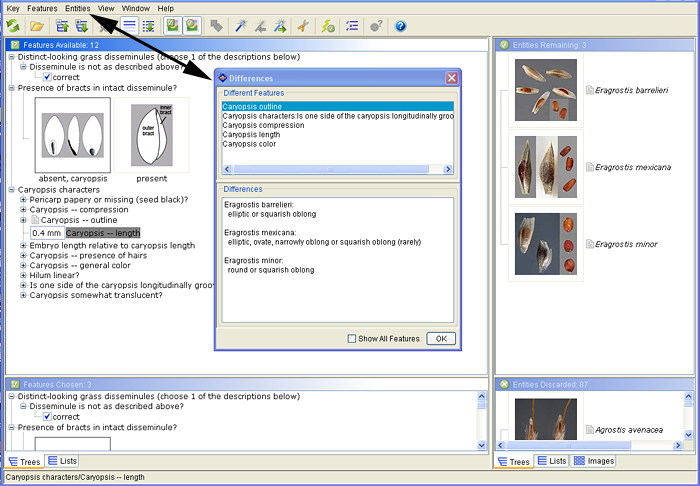
When you are down to only a few taxa but still have many characters to choose from, the Lucid Differences Tool may be helpful. It is selected from the Entities pull-down menu (Figure 13). It shows you the differences among the remaining taxa for the remaining characters that actually exhibit differences among the Entities Remaining. These features are listed in order of potential importance. Thus, you can see in Figure 13 that the feature state “round” would be +/- diagnostic of the species Eragrostis minor at this stage. Looking at each of the features listed in the Differences window will give you a better idea of the range of variation in these characters within and among the remaining taxa.
Figure 13.
In this manner, you should eventually be able to reduce the number of Entities Remaining to only one (usually) or two (rarely) taxa.
Below are some general tips to keep in mind regardless of which key you are using.
Choosing which characters (i.e., features or categories) to address
When multiple features or categories are listed in the Features Available window their order generally is not important (in a few cases, there may be a statement like “use the following characters next”). You can choose to address these characters in the order you wish. It's best, however, to choose the simplest or most obvious characters you can easily address first. Don't forget about the Best (Figure 10) and Shortcuts (Figure 11) Tools.
Reference illustrated character notes where available
As you work through the list of Features Available, you may find some characters that you do not understand. If so, review the notes page attached to that feature or category name (see Figure 5 above). These pages contain explanatory notes, illustrations or photographic examples, and recommendations for best use of the character.
Choose multiple states if you're uncertain of the correct choice
Lucid allows you to choose multiple states of a character. You would do this if — a) the disseminules in your sample exhibit more than one state, for example, if some seeds are yellow and some are brown, or if a single disseminule is half brown and half yellow, or b) your seeds are all yellowish-brown. In all these situations, you would choose both the yellow and brown states.
It is important to understand that the keys operate by considering all possible entities (taxa) at first, and then, as limiting character states are chosen, entities are eliminated from consideration. Consequently, characters are scored in the keys so that a false positive (entity is retained when it should have been eliminated) is favored over a false negative (entity is eliminated when it should have been retained). In other words, it is better to retain an entity that doesn't belong in the consideration list than to eliminate an entity that, in fact, represents the correct identification. With this in mind, feature and category states in the keys were scored broadly for each taxon.
Numeric characters
Some characters are numeric, requiring you to enter a number based on your measurement or count. Be sure to measure accurately, as some seeds are very small and sizes may be less than 1 mm. In general, for measurements in mm, round to the nearest 0.1 mm, not to the nearest mm. Do not approximate.
Lucid tools
You may find various Lucid tools helpful while navigating character choices, such as Best (Figure 10), Shortcuts (Figure 11), Prune Redundants, and Differences (Figure 13). Explanations about how to use these functions are available through the Lucid Help menu.
When several taxa remain
It is quite possible that even after addressing all the characters you can, you would not be able to reduce the number of taxa in Entities Remaining beyond a short list. This may happen because some TGWD taxa (e.g., those in the same genus) are quite hard to differentiate. Don't forget to check out the comparison charts for these taxa. These charts, as well as the taxon fact sheets, are attached to the taxa in the Entities Remaining window and can be accessed while still in the key.
How to view all Entities Remaining in group instead of list view
At any time while using the key, you can display the Entities Remaining in group instead of list view. Start by moving the borders between the four windows so that Entities Remaining takes up as much space as possible (Figure 14).
Figure 14.
Then, at the bottom of the screen, click on Images to produce the view in Figure 15. You can use the blue scrolling bar on the right to see more of the grouped thumbnails. Hover over a thumbnail for a description of that image.
Figure 15.

For further assistance about how to use Lucid, consult 'Help' from the Lucid interactive key menu.
![]()